Showing posts with label lamp. Show all posts

Faux Bois in the Living Room

This post is sponsored by Lamps.com. All opinions are 100% my own.
 
When Lamps.com approached me a little while ago about featuring one of their lamps, I ran - not walked - to their website to check stuff out. Like a greedy little... I dunno. Whatever's something very greedy and overly excitable about lighting options, I guess.
 
 
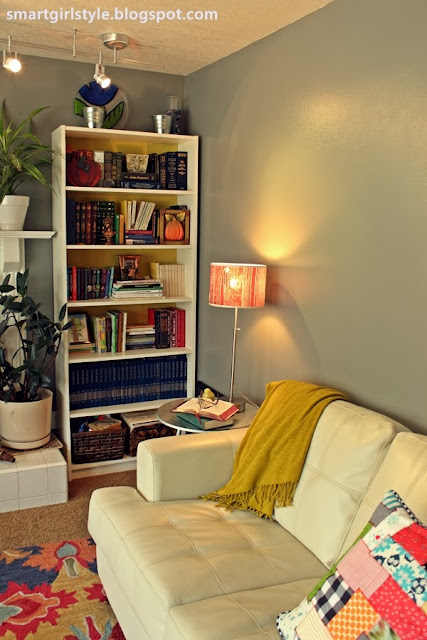
This lovely contemporary lamp sang to me from the cyberwebs. (Which isn't easy, btw.) It looks a bit reddish in these photos. In real life, the color is a pretty, rich shade of chocolate.
 
 
I love the streamlined look of the entire lamp - a simple base, slim lamp stem, and adjustable height feature. Design elements are neither overlooked nor wasted.
 
 
And, although it was a hard choice of lampshade (honestly, I kept going back and forth between about five of them), you just can't go wrong with faux bois. 
 
 
A table lamp is just what the corner of our living room has needed for a long time. (For real; we've read many a chapter squinting in the not-quite-sufficient-for-reading light of the track lights.) And this one is perfection.
 
 
Also, I just have to say: the original lamp base was damaged during shipping. I contacted Lamps.com and they promptly sent me another one, free of charge with no questions asked. Two thumbs up for that convenience in customer service.
 
What lamps are you guys loving lately? Have you added any faux bois to your décor? I'll admit it freely - I'm in L-O-V love with this trend.
 
Do what you want, but I'd highly recommend checking out Lamps.com - the fantastic lighting options they've got will astound you.


{shared: Coastal CharmDIY by DesignDragonfly Designs, GingerSnap Crafts, My Fashion Forward Blog, My Girlish Whims, My Uncommon Slice of SuburbiaNew Nostalgia, Not Just a Housewife, Simply Designing, The Happy Housie, }
Pin It Now!

Master Bedroom Makeover: Lighting

Master Bedroom Makeover
Day 9: Lighting (or: DIY Faux Capiz Shell Chandelier)

** Note: This post is part of a 12-step series in my master bedroom makeover. Links to the other (previous) steps are listed at the end of this post.

This is just a simple post to show you how to save $millions$ (yep) by making your own faux capiz shell chandelier. Here's mine:


Our original master bedroom lighting was this:

 
So. Several online tutorials involved melting wax paper together with your iron to create the "shells." This method, however, caused me to nearly burn my house down, because my iron didn't melt the wax paper together and so I tried to melt it in the oven but actually it ignited and large flames engulfed the inside of my oven and around my arm when I opened it up to get the pan of wax paper out. True story. Also traumatic.)
 
I came up with this non-flammable method instead: 
 
First: Find some sort of hanging device, like wire planters/hanging basket holders or wire bowl. Spray paint this white so it's ready when you are.
 
Get some rice paper. I found mine at Hobby Lobby with the calligraphy stuff; it was about $14 without the 40% off coupon.


I called around to find the best deal on laminating and then laminated a bunch of the rice paper. I think I used six 15"x24" sheets for a four-tier 12" chandelier. (Money-saving tip: ask the laminating people the width of their laminating machine, and cut the rice paper roll into sheets that wide so they can send the paper through sideways and maximize your money.) Looked like this:


Cut out and staple two of the sheets together in several places along the edge to hold them together while you circle punch.

 
Using a circle hole punch (I used 1.5"), go to town. Watch or listen to something interesting, because this can be tedious. Oh, and it can be rough on circle punches, I won't lie. I went through two of them.


A zillion hours and the start of carpal tunnel later, you'll have a bunch of circles. Lay them out to see how many you want per strand. I think I did 10 on the bottom tier, 8 on the next, and 7 in both of the top two tiers.

 
I laid some wax paper down onto a baking sheet and started hot gluing circles together, just a little bit on the ends. (The wax paper is for if some glue leaks out from your line, it won't stick.)


Then I glued a little fishing line onto the top circle and left about 6" of overhang. This will be for tying the circle strand onto the wire fixture.

 
I started feeling a little antsy after creating a bunch of circle strands, so I started tying them onto the wire fixture and then hot gluing the knots. (Just because I'm not the best fishing line square knotter in the land and wanted these to stay put.)

 
After what seems like (and actually is) a long time, you'll end up with loads of circle strands tied & hot glued to the wire fixture. Be careful not to bend the strands so the glue won't snap apart.

 
Hopefully you will have measured your wire hanging device prior to starting to make sure it fit the light fixture space. I didn't. Mine was 12", and I needed something at least 14".
 
 
*blink*
 
 
Ah, nuts.


I was super bummed at first, but then I realized this chandy would fit perfectly in my daughters' room. They LOVE pretty stuff like this. I hung it up with some inexpensive white metal hooks from Lowe's, and viola!

 
You'd think (hope?) that this was the end of the story, but it's not. Remember that the master bedroom is still without an acceptable light fixture. And I really really wanted a breezy chandelier in there (even though now we'd be twinners with our 4- and 6-year-old daughters...is that weird?).
 
I decided to make another one, but I didn't have any more wire hanger devices handy...neither could I find one for $10 or less. Until I went into my garage and spied some old round tomato support things! Hanging from the garage wall! Hanging there for years because, frankly, they didn't do squat in supporting our tomatoes! Hooray for their failure!
 
An embarrassing display of a happy dance and some wire snipping later, I had fashioned the *perfect* wire hanging thing. And I double-checked the size this time. 14" exactly. BAM.


I started zealously punching many more circles. This time, I sewed the circle strands instead of gluing them (used plain white thread) and did everything else the same, and I must say...this method was waaaaay better than hot gluing the strands. Easier, faster, and I like the look of the chandelier better. A little more free & easy; the "shells" move a bit when you walk by, and I like that.


It does require more circles if you sew them, that's for sure. Because they turn sideways sometimes (unlike the glued ones). In fact, I may still beef up the number of strands on this one. But for now, I rest. And enjoy the light. 

Tomorrow is Day 10: Furniture. Come back for the vanity chair's new look!

Check out previous steps during the 12 Days of Master Bedroom Makeover:
Pin It Now!

Living Room Makeover

** Addendum: If you're interested in seeing further updates to the living room, check out this post. **
 
Remember how last week was supposed to be living room makeover week? Yeah...well, a day (or week) late and a dollar (or more) short. That's me.
 
Even though it's not finished (it won't ever be "finished," that's part of the fun!), I've loved incorporating a variety of living room ideas that have resonated with me into this space. This has been a slow process for me (going on six years now)...I wonder what the next six years will bring...
 
So. Buckle up for transformation time. This minivan lady can haul.
 
It's a pretty basic/modest living room design; here's the room before:
 
 
You guys, so many things about the setup above I want to address but am almost embarrassed to. Furniture pushed up to the walls and a wiiiiiiide open No Man's Land in the middle of the room, the blinds-only windows, the plant with a single huge stalk being held up by the wall (whut the...), the grossly undersized clock above the mantel, the two 80s track lights, the unintentional focus on an unused stark fireplace, the blah-ness of it all.
 
 
 But here's the thing. We didn't have money (or it wasn't a priority) for a huge one-stop living room overhaul. I've had lots of living room decorating ideas over the years, though, so we've changed things up and out, one piece at a time. 
 
Over the course of a few years, the living room coming closer to how I actually want it. It's certainly not perfect now, but here's where we're at today:


We've changed a lot (starting with the color scheme), and it's still a little busy. But I love it so much more as a room that's closer to what our family is all about.


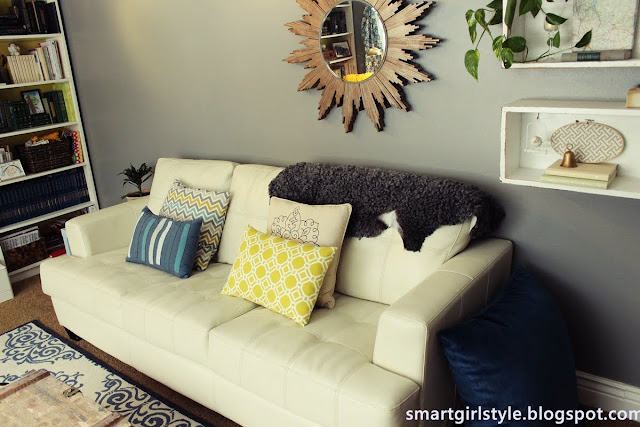
We changed the paint color (BM Phoenix Fossil 3/4), added ceiling-to-floor drapes (Amy Butler), added bookcases to flank the fireplace (Ikea) and painted the backs, changed out track lighting...for more track lighting (Lowe's), added a large mirror above the mantel (TJ Maxx), added a rug (Overstock), added old & new furniture, and did some DIY projects (sunburst mirror, reading lamp, throw pillows, etc.).

 
I love how mixing old and new tells "our" story. Like my gramma's ottoman that I recovered with an Ikea sheepskin, this vintage trunk as a coffee table, the reupholstered thrift store tulip chair, the bookshelves filled with books and objects from my childhood (which are now weaving themselves into the childhoods of my own children).
 
 
I'm working on trying to increase the calmness of a space by being well-edited. Not there yet, but I'm learning my own style as I go.


It's a work in progress. For life. But a fun work in progress!
 
 
Some projects still looming: slipcover the grey loveseat, find another lamp (or pair of lamps) for the white sofa, make the bookcases look more built-in, and redo that light blue side table.


What people see immediately when they walk through our front door into our entry way:
 
 
I don't think decorating a living room space is ever "done." At least, not for me. Which...hooray! Because changing things up brings me joy.
 
 
Annnnd, one more time. Just because it's like a cyber-pat on the cyber-back:
 
 
Addendum: I'm constantly changing things up... Exhibit A: This sneak peek into the most recent living room changes:
 
 
If you're interested, check out my most recent living room update, some of my other room makeovers, or the full (yet incomplete) house tour
 
Have a wonderful week!
xox 


Featured!
    My Uncommon Slice of Suburbia   New Nostalgia
 
also shared:


TDC Before and After
Pin It Now!

brass lamps and an imposter

I've had metallic reading lamps on the brain for a while now. But, really, can you blame me?


Fast forward my life through some milk spills and kids' hugs and lost car keys...
 
...and guess what I spied at my local thrift store yesterday?
 
 
Not a pretty brass, but the shape was perfect. As was the price tag:
 
 
Nothing you can't fix with a little Rustoleum metallic spray paint.
 
Hello, little lamp. Welcome home.
Pin It Now!
Related Posts Plugin for WordPress, Blogger...
Pin It button on image hover