
Guest Bedroom Makeover
Day 4: How to Make a Pallet Headboard
**Note: This is part of a 12-step bedroom makeover series. Find the previous steps at the bottom of this post.**
So I'm not reinventing the wheel with this. Just, y'know, taking the round wooden version (of said metaphorical wheel) and gluing it. And sanding it a little. And then whitewashing it.
Here's a sneak preview:

For the full headboard tutorial, click through the break...it's a little photo-heavy. And by that, I mean, it's basically one enormous string of millions of photos with a few words in between.
Start by gathering some pallets. The number you gather will depend on the size of your headboard and the condition of the pallets. I got mine from the dumpster area of Sears (after first checking with the nice gentlemen inside).

Take off the pallet boards that you want to use. If you have a saw that will cut through nails, I'd recommend using it. I didn't have one immediately available and wanted to get going, so I just used a crowbar and hammer. It took a while but was doable.

Remove unnecessary nails.

Matching the widths of the boards, I started laying them out. (I love doing stuff like this!)
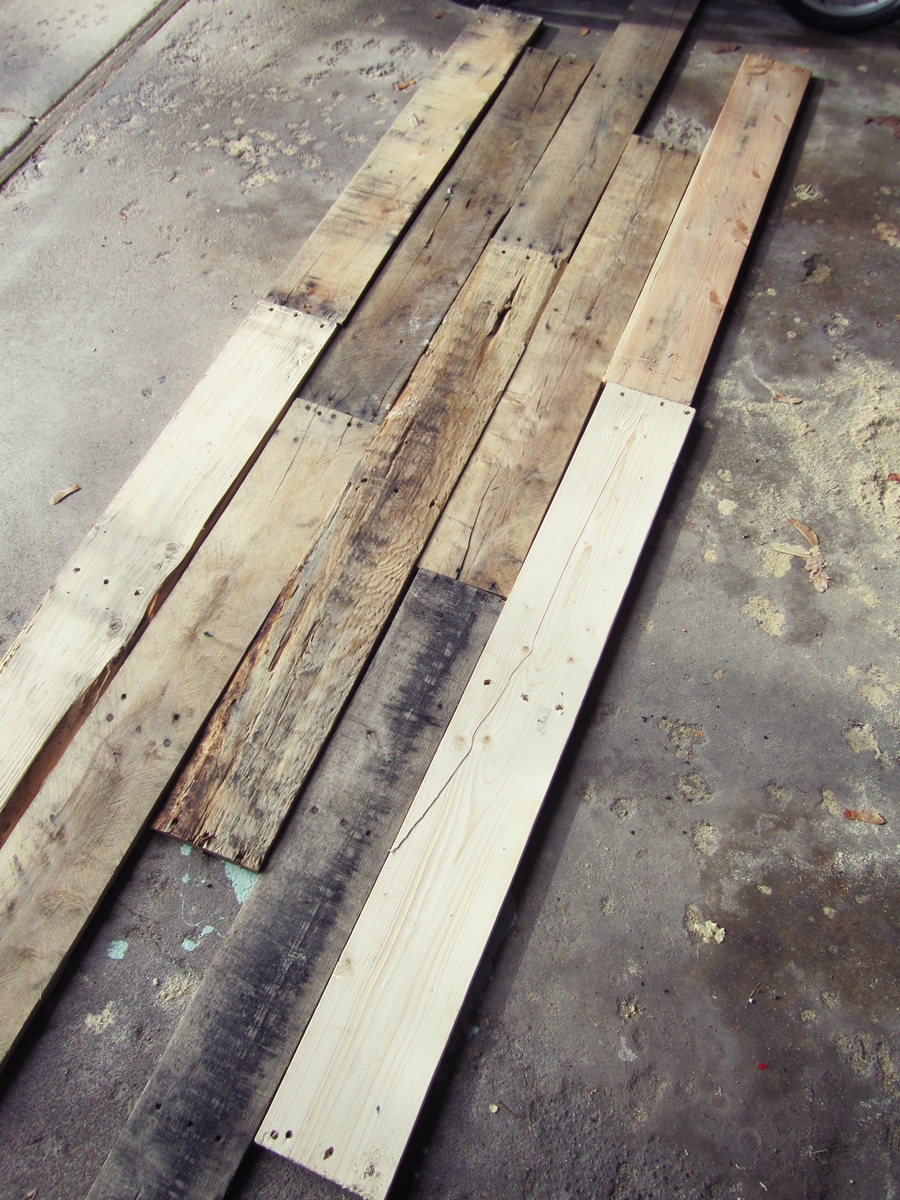
With your measurements in mind (mine is wide enough for a full-size bed with a few inches to spare on each side, and it's about two feet tall), mark one side line for cutting. I cut one board at a time using a radial saw.

When laying the boards back into the lineup, I spun some of them 180 degrees so my freshly cut ends were no longer on the headboard edge, and instead the actual pallet-cut edges (with nails) were. Because I liked the "nailed together" and weather-worn look at the edges.

Measure, mark, and cut the second side of the headboard. (I used some of the cut-off board ends from doing the first edge to fill in gaps on the second edge. This saved some cutting and let me use the boards I really liked twice.)
You could skip the next step if you like the natural look and finish at this point. I wanted to whitewash mine, however. After cutting, and being sure to keep the arrangement the same, I transferred the boards onto a drop cloth. (Don't be alarmed, that's not blood on my drop cloth! It's fence stain. Promise.)

Mixed up some whitewash in a loose 1:1.5 ratio (paint to water...as in, I poured in about an inch of paint and about an inch and a half of water). Mix it up.

Here's a great opportunity to let the little paint-lovers help. (Also: I actually built this a couple months ago. No way, no how could we be out doing this in the freezing temps these days!) Whitewashed the whole thing, including the sides.

It ended up looking something like this:

After the paint dried (didn't take long), I sanded with some heavy grit paper...I used 60, I think. Feel free to pick up the boards and sand the edges as well. Because this will be a headboard, I wanted it to be safe to the touch. But also pretty organic. There's a fine line. Annnnd I think I'm still on the side of "organic," but whatevs.

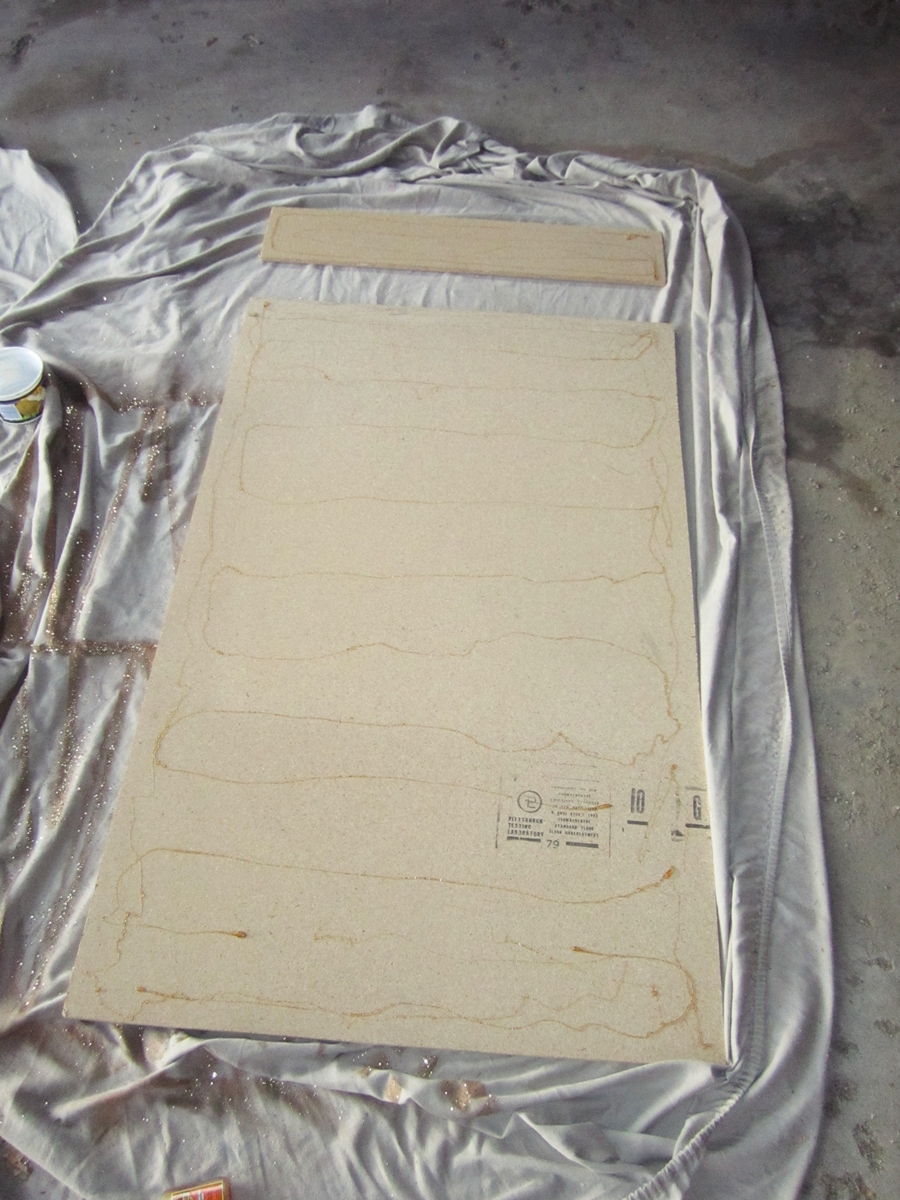
Next, I cut a piece of 1/2" particle board almost to size. (NOTE: You should use plywood, but I didn't have it on-hand and, big surprise, moved ahead with what I did have. It turned out okay, but plywood would be way more secure and supportive.)
Before cutting the large board, I measured about 2 inches off all sides of the actual headboard because I didn't want the particle board to be visible at the edges. (So, for example, if your headboard will be 24" tall and 60" wide, cut your particle board to be 20" tall and 56" wide. This allows for a 2" overhang of the pallet boards on all sides.)
Drizzled a bunch of my favorite adhesive, Gorilla Glue, onto the particle board. You could use regular wood glue here instead.
Transferred all the pallet boards onto the particle board, taking care to leave about 2" of overhang on all sides. Then I took regular big-headed nails that we had on-hand and hammered them into some of the existing holes in the pallet boards. Because I like the rustic look of the nails, plus it reinforces the glue.
(Note: The pallet boards might are prone to splitting if you nail into them, so I would recommend pre-drilling if you create a new nail hole.)
(Note: The pallet boards might are prone to splitting if you nail into them, so I would recommend pre-drilling if you create a new nail hole.)

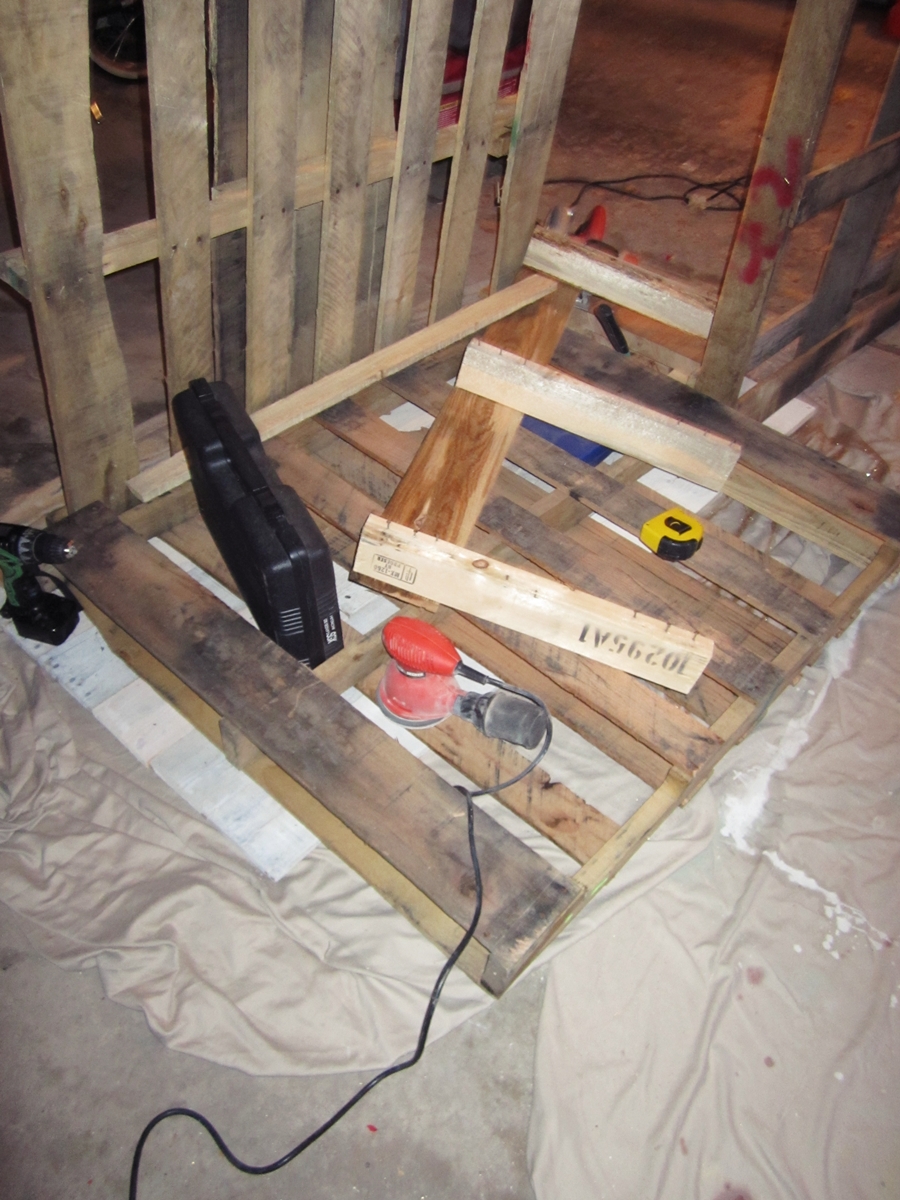
After nailing was complete, I loaded up everything around me on top of the headboard to "clamp" it while the glue dried. It was late at night at this point, and I now find this photo (below) hilarious. A tape measure and electric sander as "weights"? Really? Haha! (I think I found some nail boxes being weights the next morning, too. It's pretty amazing that these projects of mine work out sometimes...)
I used this hanging system I found for about $10 at Lowe's. It can support up to 200 pounds, and the salesguy told me it was super easy to install. Sold.

He was right, it was very easy. Especially for me...because my fantastic husband Paul did most of the work.
What's that you said? Now you'd really really like to see a poorly lit, kinda blurry and shadowy photo of the mounted pallet headboard? You got it. Here:

Here's another photo of that corner that's a little more true to color. Ish.:

I love it. Love love love it. Especially because it was, other than the $10 wall mount, totally $free$.
A free headboard? Get OUT! (Insert Seinfeld's Elaine-esque e-shove here.)
I'll post other better photos of the headboard in full when the bedding comes together. But for now, I'd love it so much if you come back for Day 5: Fabric-Lined Large Bookshelves. Just because we're friends now, right? Nothing like sharing a pallet board project to bond people together.
Plus, you've got to admit you're curious how a room that started out this bad could possibly transform itself in a mere 12 steps.
Check out the previous steps to this bedroom makeover:
Day 1: Inspiration Board
Day 2: Paint Walls
Day 3: Ikea Malm Dresser Makeover
{shared A Glimpse Inside, A Vision to Remember, Be Different Act Normal, Chic on a Shoestring Budget, DIY Showoff, Finding Fabulous, Funky Junk Interiors, House of Hepworths, I Gotta Try That, I Heart Naptime, I Should be Mopping the Floor, Miss Mustard Seed, Nifty Thrifty Things, Or So She Says, Serenity Now, Shabby Creek Cottage, Shabby Nest, Simply Designing, Somewhat Simple, The 36th Avenue, Under the Table & Dreaming, WhipperBerry}
gorgeous rustic chic eye candy for me!
ReplyDeletehope you'll stop over soon--we'd love to have you.
michele
Thank you, Michele. I love it, too!
DeleteLooking for a cute pallet headboard idea and run into you Michele. How funny!
DeleteLove the headboard too!
Absolutely gorgeous headboard!! My husband made us an outdoor table from pallets and I LOVE it. Perhaps I'll talk him into making me a matching headboard....that would just go in a different room :)
ReplyDeleteHah! Totally. Pallets are so sweet, right? An outdoor table is a genius idea. Hmmm...
DeleteI found your blog on Funky Junk and I love this headboard! I have some palletts and ideas for a headboard, but now that I have your tutorial I really have no excuses not to do it...oh, now just to find the time! Thanks for the inspiration.
ReplyDeleteJulie
I know. Time is the hardest to come by. This wasn't that hard, actually, Julie. I promise! You could bust this out no sweat...especially if you had a skil-saw that cuts through nails. Easy peasy.
DeleteI love this! I've just madeover our playroom and want to add some pallet art, so I think I will definitely do the same washed paint effect, it looks great! Going to check out the rest of your nice blog :-)
ReplyDeleteAntonia
http://tidyawaytoday.wordpress.com
Pallets add such a nice hint of earthiness...or maybe not even a hint. Maybe an assauge. But either way, I love the whitewashed effect as well. It has softened and naturalized the basement room already. Good luck, Antonia!
DeleteVery nice! I could picture thin as a back drop for photos too...will have to add it to my pinterest collection ;o)
ReplyDeleteOooh, that's a great idea, Heidi.
DeleteLove it, great resourcing too.
ReplyDeleteThanks Sheryll.
DeleteI actually do feel like we have bonded now haha I am definitely keen for one of these!
ReplyDeleteHaha! Totally. BFFs forever and all that stuff. I'll send you the other half of a heart locket in the mail...
DeleteThis comment has been removed by the author.
ReplyDeleteLove the headboard! I made one for my sons room along with a pallet bed base and wall shelf. The base of the bed has red rope lighting (his choice)and it is Super-groovy I must say. Keep up the good work, you are an inspiration!
ReplyDeleteBlessings!
<><
I have been working on a pallet bed for a week now & was trying to find the best way to make a headboard similar to yours - thanks for the helpful tips! looks great!!
ReplyDeleteI have been working on a pallet bed for a week now & was trying to find the best way to make a headboard similar to yours - thanks for the helpful tips! looks great!!
ReplyDeleteit was a wonderful chance to visit this kind of site and I am happy to know. thank you so much for giving us a chance to have this opportunity.. stop bed from banging
ReplyDeleteIt looks like the wooden pallet is about to deteriorate already the coloration turns a bit black already
ReplyDeleteliquidation pallets
World class headboard nz here. We provide high quality products which you should buy. Invest in quality.. cheers
ReplyDeleteAmazing outcome to your design style.
Love the peaceful calm your room has taken on...the headboard a job and a half, but the outcome well worth it.
The InGenious Guru is originally a design advice and guide blog, it is also a great resource for inspiration. In particular, it is great for ultra-modern and abstract designs. If you want to create a logo that pushes the boundaries, this site is a must visit.
ReplyDelete"Dreamy Transformations" is not just a blog; it's an invitation to reimagine your sleeping space and embrace the satisfaction of creating something beautiful with your own hands. Ready to embark on a journey of bedroom rejuvenation? Follow our blog for an engaging DIY experience that promises to turn your bedroom into a dreamy sanctuary.
ReplyDeleteAbogados Bancarrotas en Virginia Beach
ReplyDeleteliquidation pallets near me
Liquidation pallets near you offer a cost-effective way to purchase surplus inventory, allowing businesses and resellers to access a wide variety of products at significantly reduced prices. These pallets typically include items such as electronics, home goods, and clothing, sourced from retailers looking to clear excess stock. By buying liquidation pallets locally, you can save on shipping costs while discovering unique products for resale or personal use.