
Warning: this is a super duper long (and, if I'm being honest, tedius...unless you're reupholstering a tulip chair yourself) post. A photo-laden how-to-reupholster anything post is bound to be that way. If you're impatient and/or have better things to do with your time, here's a quick synopsis:

There. Off you go.
For the rest of you (hah! as if...), here's the scoop:
Remember this lovely $5 thrift store find?

I've been going back and forth and back and forth and back and...yeah, you get the idea...about how to reupholster the chair. I wanted a bright mod orangey-red, but I couldn't find the color anywhere local, and after two failed online fabric purchases (perfect color on my screen, not the right color in person. Rats.), I got discouraged.
Then I moved onto my new color crush: chartreuse. I found a great fabric in the Robert Allen home dec line, but it was $50/yard. I just couldn't bring myself to fork over the $100 (needed two yards).
So, long story short (too late), I eventually found an alternative in the same color family for less than $6/yard. Sold. There's a time and a place for everything, and, for me, it's the time to spend $12 instead of $100 to take a stab at a reupholster job requiring lots of sewing and an unforgiving fit.
(Plus also, I got new jeans instead. #silverliningforbeingcheap)
Here's what I did:
First remove staples, then the stitching of all chair pieces. Be careful to keep the original fabric intact; these will be your pattern pieces.
Then trace fabric pieces onto your fabric. Match the grain. The point is to get as exact as possible on these, with one exception: wherever the fabric is going to be stapled to anything, you can leave the fabric an inch or two longer. In fact, I'd recommend it.
Also, for this project, on your long rectangular piece that is the front of the chair seat itself, give yourself an extra 2-4 inches on each end.

Cut out the pieces.

Iron all pieces.
We'll be doing the front of the chairback first. Find the middle piece and lay it down RIGHT SIDE UP. Pin single piping onto one edge (if you don't know how to make piping, google it; it's not hard, I promise), keeping all raw edges aligned. Pin piping onto the other edge of the middle piece.

You could do this one of two ways. You could first sew the piping onto the middle piece, then pin the side pieces on top of the sewn-on piping and sew again.

As for me, I chose to pin all three (the middle back piece, the piping, and the side piece, with right sides of the middle and side pieces facing INWARD) together and carefully sewed, right up against the cord inside the piping.

After sewing, the front (of the chairback) looked like this:

Set that aside. We'll do the chair seat next. (Why? Because that's how my late-night brain did it, that's why.) Grab your piping that goes around the chair seat. (*Note: With piping, it's a good idea to have the fabric a couple of inches longer than the piping cord, on each end. You can always trim it if needed, but it's good insurance for if you come up a wee bit short.)
Fold, then iron the edge of one end down to create a "finished edge." (This will wrap around the other end of the piping, but we'll get to that.)

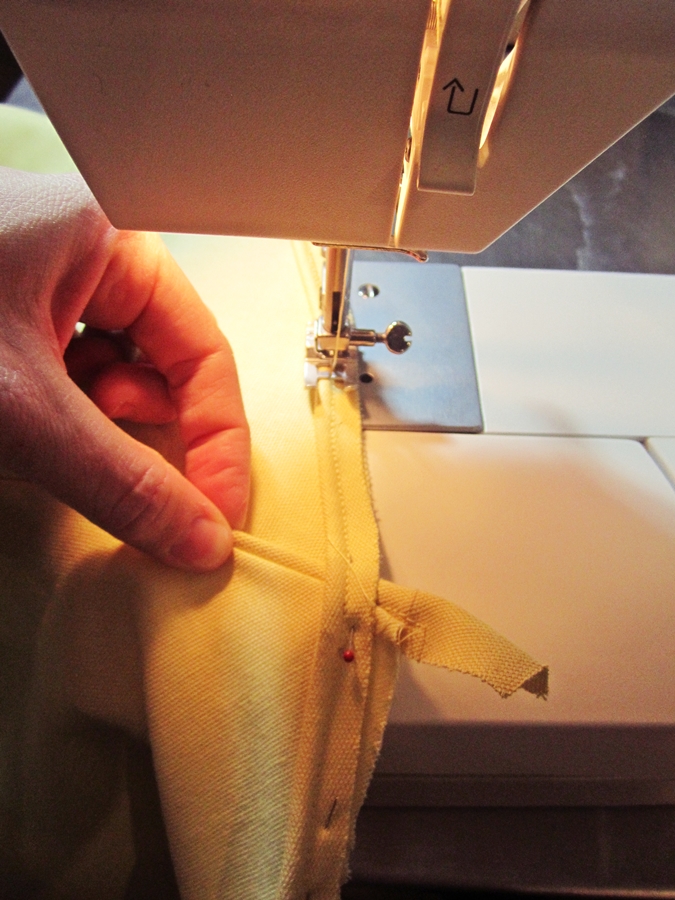
Pin your non-ironed piping edge to the RIGHT SIDE of the chair seat fabric. I wanted to avoid a lot of seams in the middle, so I picked a spot near the back of the seat to start pinning. When you start sewing the piping onto the fabric, start about 1-2 inches in from the end of the piping. You want the very end to be totally free, so the ironed/finished edge of the other end can wrap around it, like a hot dog bun around a hot dog.

Below shows a pic of the sewing machine finishing up the piping. Notice (where my fingernail is holding) the ironed edge of the end of the piping has wrapped around the unironed edge of the start of the piping. Sew.

Now that piping is sewn on, lay the chair seat down RIGHT SIDE UP. Find the middle of the chair seat. Pin the middle of the long rectangular piece that will be the front of the chair seat, RIGHT SIDE DOWN (so both right sides are facing each other), to the middle/front point of the chair seat fabric.

Starting from here, pin the two (RIGHT SIDES should be facing each other) all the way around the chair seat.

When your pinning takes you to the back side of the seat, the edges of the long rectangle will overlap. (I forgot to snap a photo at this point, so bear with me as I try to explain it.) Fold back the overlapping piece that is on top (it doesn't matter if it's coming from the right or left, just fold it so it's out of your way), and unpin the first two inches of the overlapped piece that is on bottom. Fold up one inch of the bottom piece back against the overall rectangle. By folding it over, this creates a "finished edge." Pin.
The other end of the rectangular piece (which is the part that was originally on top of the overlap) is now ready to be laid down and overlap the end of the rectangular piece that you just folded. Pin. There should be at least 3 inches of overlap (no biggie if there's more), measured from the fold to the raw edge of the overlapping top.
Sew.
Also, depending on your fabric, you can/should zigzag or serge all raw edges.

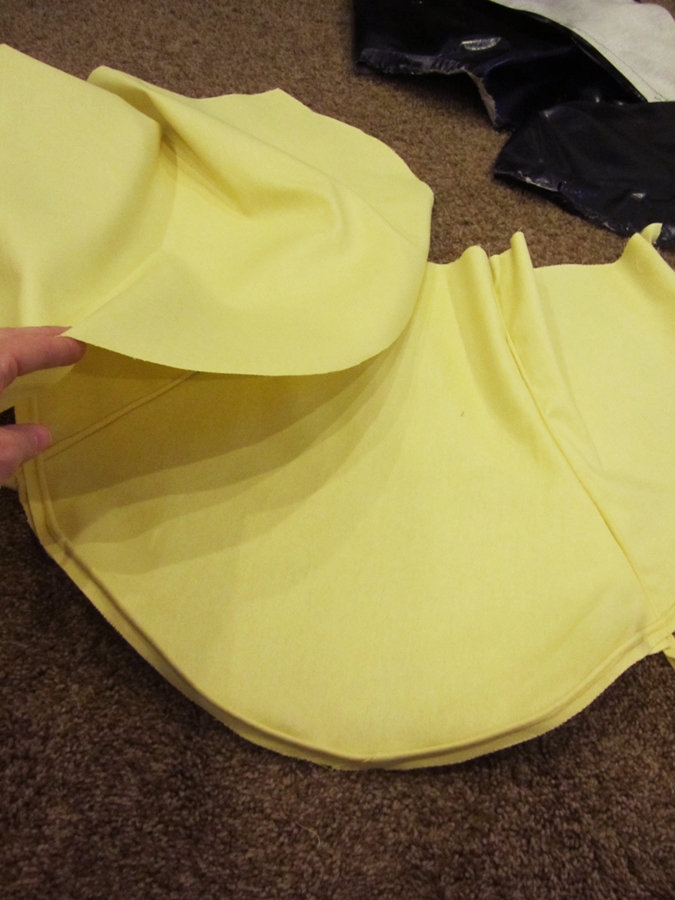
Your chair seat, when flipped right-side-out after sewing, should look something like this:

Set the chair seat aside. Are you getting so sick of this yet? No? Atta girl. Or boy. Or whoever.
Next, we'll be sewing the back side of the chairback to the front side. Find the top-middle of the back chairback piece; stick a pin here. Find the middle of your chairback piping. Pin these together, fabric RIGHT SIDE UP and raw edges together.
Next, we'll be sewing the back side of the chairback to the front side. Find the top-middle of the back chairback piece; stick a pin here. Find the middle of your chairback piping. Pin these together, fabric RIGHT SIDE UP and raw edges together.

Starting at this middle point, pin down one side the fabric edge until you run out of piping. Pin the other side.

Sew piping on. Make sure both piping bits on the front side of the chairback (the piping that you sewed on very first) are both facing either the outer or the inner edge of the chairback. You want symmetry. I chose to sew them facing them outward.
After piping is sewn on, lay the front side of chairback RIGHT SIDE UP while laying the as-yet-untouched back side of the chairback RIGHT SIDE DOWN on top of it. (Right sides facing inward.)
Pin. Sew.

Turn chairback piece right-side-out. Cross your fingers that it will actually fit on the chair frame.

Mine was super tight, and at first I thought it wouldn't fit. But then it did. #biggestsighofreliefEVER. Pull the front and back down, and start stapling the front middle to the frame. Then, pulling taut (you want your top piping to line up with the top of the chair frame), staple one side and then the other.

After ensuring you have a taut, smooth fit in front and back, finish the staple job along the bottom of the front of the chairback. Here, you could also pull down the back of the chairback very taut around the bottom of the chair frame and staple it to the front, just below the staples you just did. In fact, I would do this. I'm not sure why I didn't.

Instead, I moved onto stapling the chair seat. Covered the existing foam (which was in surprisingly good condition, otherwise I would've replaced it) with thin batting. Stapled it down, keeping things very tight. Surprisingly (at least to me, in my earlier reupholstery jobs), weirdness in foam/padding does show through on the finished product, so you want to make sure everything is smooth and even BEFORE covering it.

Then fit the chair seat cover onto the chair seat frame. The photo below shows what our folded-finished edge (that I tried to describe to you without pics earlier) looks like. I stapled this with one staple first, simply to keep it in place as I tugged on the rest of the seat cover. I started "for real" stapling in the front-middle of the chair seat.

Then I did the back middle of the chair seat, then each side. Basically, I like to work in opposites in cases like this. Make sure you're pulling taut always, and double checking the top of the chair seat for smoothness and an even/balanced layout. Then staple corners, keeping pleats confined to the underside of the chair seat.
I went a little hog wild on the corner staples. That's how I like it. Nice & secure.

Then screw the chair seat onto the chairback. (I don't know why I made that one word throughout this...but I'm too lazy to change it now.) At this point, since I hadn't stapled it yet (although you all may have already done so), I pulled the back side fabric of the chairback under the chairback and stapled to the bottom-most front side (under the seat cover, where you won't see it). And I staple-finished the front corners of the chairback. I saved this step for last because I wasn't sure what, exactly, would be visible until it was all assembled.

Attach the chair back onto the base. Viola.

Here it is in my living room. It looks more buttercreamy in this photo than it actually is; in real life, it's a pale chartreuse.

It's not perfect, and I definitely learned some things...and mumbled some not-so-nice words under my breath during the learning process. I'm excited for my next reupholstery attempt, though, whatever that may be, because I feel like I get better each time. One of these decades, I'll be like a professional reupholster! (Or pottymouth. One of the two.)
{shared Miss Mustard Seed, here, here, here, here, here, here, here, here, here, here, here, & here}
also shared:

Pin It Now!
Oh my word. these projects stress me out just thinking about how I would even attempt to do it. you are AMAZING! good grief.
ReplyDeleteStop. Not amazing. Just regular!
DeleteVery impressive, and BRAVE! It turned out super:) I came over from Craft o Maniac. I'd be delighted if you came over and said hey in my neck of the woods too!
ReplyDeleteAlyssa
www.myclevernest.com
Thanks, Alyssa. I'm afraid I'll attempt anything in the reupholster realm...not that they all turn out, of course. I've definitely created some doozies!
DeleteIt may be more than I am willing to take on right now but nevertheless I think that your tutorial was quite impressive and I think there are a lot of readers out there that will benefit from and really appreciate your post. So glad you linked this up to BeColorful's Motivated Monday this week.
ReplyDeletep
Yeah, this is kind of a narrow-minded post. I mean, how many people are really sitting around with an old tulip chair on-hand, thinking to themselves, "man, I wish I could find something online about how to redo this chair." Now if it was a post on how to make your own m&ms, well, THEN we'd be somewhere.
DeleteGreat job with that chair! It looks as good as new!
ReplyDeleteThanks for linking to a Round Tuit!
Hope you have a fabulous week!
Jill @ Creating my way to Success
http://www.jembellish.blogspot.com/
Thanks, Jill. I'd say almost anything is a step up from ripped automotive pleather.
Deletegreat post! Would love if if you linked up on my blog hop www.w-t-fab.com/search/label/bloghop. Also let me know if you'd like to follow each other!
ReplyDeleteOk a headboard will be a piece. Of. Cake. After this guy wowsers britt.
ReplyDeleteTrue. This wasn't easy. Heh. But it was worth it!
DeleteAwesome! I've got an old mod chair just like yours and I am preparing to upholster it in yellow, too! So thanks a million for the tutorial :)
ReplyDeleteThis comment has been removed by the author.
ReplyDeleteI always like to decorate my bedroom well. So I have chosen some special furniture for my bedroom. Actually I preferably select Poundex F9389Q bedroom set which contains leather bedroom set includes bed, mirror, nightstand etc. I am really happy with the new look of my bedroom.
ReplyDeletepinoy tambayan lambingan and all the filipino Tv replays you will be watch online in hd. We will share with you pinoy1tv replays online in hd.
ReplyDeleteWhen your website or blog goes live for the first time, it is exciting. That is until you realize no one but you and your. Floating Vanity
ReplyDeleteWhen your website or blog goes live for the first time, it is exciting. That is until you realize no one but you and your. Zero two figure animation lamp
ReplyDeleteReally I enjoy your site with effective and useful information. It is included very nice post with a lot of our resources.thanks for share. i enjoy this post. Live edge desk
ReplyDeleteReally I enjoy your site with effective and useful information. It is included very nice post with a lot of our resources.thanks for share. i enjoy this post. Outdoor furniture set
ReplyDeleteAs a women-owned business, their commitment to quality and convenience shines through, making them a go-to choice for any occasion. From heartfelt gestures to professional tokens of appreciation, Perfect Peonies has your gifting worries covered with a touch of Southern charm.
ReplyDeleteThe Pennsport neighborhood in Philadelphia is a great choice for those seeking a vibrant and diverse community. Grow Property Management's guide provides valuable insights into the area's real estate market and local amenities, making it a useful resource for both newcomers and prospective investors. https://philadelphiapropertymanagementsolution.com/pennsport-philadelphia/
ReplyDelete