
I don't know if it's the cooler weather or the craziness of back-to-school life with swimming, piano, scouts, and the miscellaney of life, but I'm struggling finding time to do projects around here. Does anyone else ever go through days or weeks (or, fine, months...) like that? Where the hours in your day simply don't allow for all you want to do?
That's me, right now.
But remember how we started building a clubhouse, slash, treehouse for the kids in the backyard? Good news: we're still making progress on it!
Let's begin where we left off last. First, we added brackets to attach the floor frame to the bolted tree support.

Broke some child slave labor laws to do so.

After the four outer frame boards (pretreated 2x6 lumber) were leveled and attached to the posts, we started hanging the floor joists with brackets. The floor joists were spaced 16" apart, center to center.
Click through for the rest of building a clubhouse...
The plan was to lay 1x6 cedar planks for the floor. In order to support the plank ends next to the posts, we had to install an extra support piece directly on the inside of the post. Just cut a spare piece of the pretreated 2x6 lumber and screwed it in. The ends of the two edge cedar planks were then screwed into these supports.
The plan was to lay 1x6 cedar planks for the floor. In order to support the plank ends next to the posts, we had to install an extra support piece directly on the inside of the post. Just cut a spare piece of the pretreated 2x6 lumber and screwed it in. The ends of the two edge cedar planks were then screwed into these supports.

Installing the floor planks. This was the fun part! Cedar 1x6 boards. The grain on that stuff is beautiful, plus it's a great outdoor wood.

Someone is channeling his inner one-glove Michael Jackson. We used 1/4" (or maybe 1/8") tile spacers for the planks to keep things even.

Paul's knees were killing him by this point. But it looks great.

So. Flooring done. Went in pretty fast, actually. Fast-forward to the next available day of labor, and we moved on to the railing.
Using 2x4 8' lengths of redwood, Paul cut them in half then screwed them onto the outer parts of each posts where the flooring planks didn't reach.

This provided a flush vertical surface for the future railing.

Using more 2x4 pieces of redwood, we measured then built frames to go on each wall between two posts.

Screwed the frames into the posts, added 2x4s, and floor.

Just some more pics. Heh.

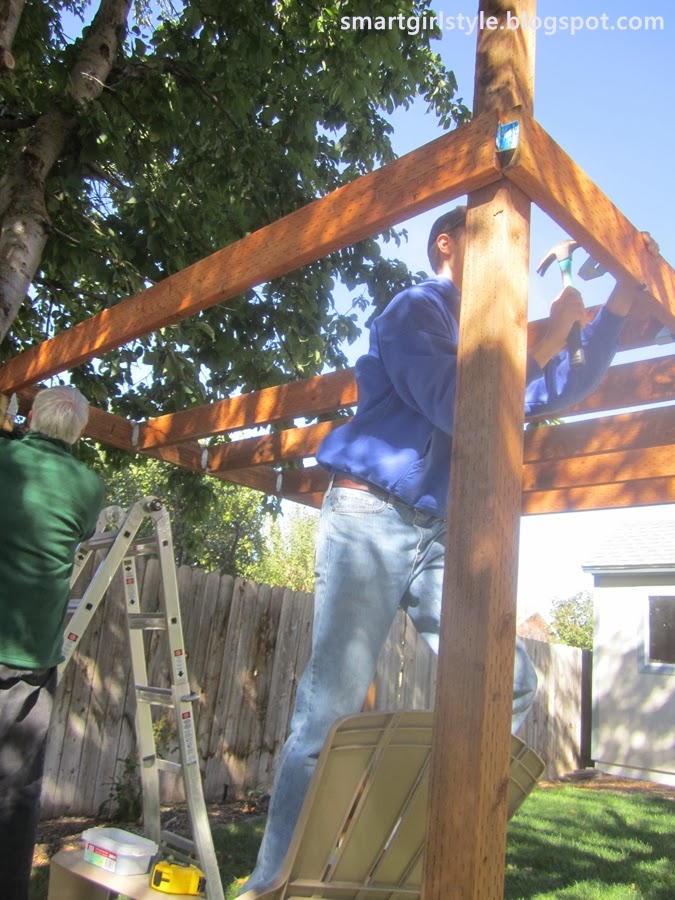
So the corners of the clubhouse are looking fairly complicated at this point. (And, let the record show, although the pics show only Paul working...I promised I helped!)

I've labeled the individual components below.

Ah, yes. Construction zone with toddler in tow is an ever-vigilant place. She required constant supervision...and lots and lots of pea gravel to displace.

Last one!

Photos of the railing will be forthcoming. Phew. The kids are already loving this, though, so that's super rewarding.
Pin It Now!
No comments:
Post a Comment