Showing posts with label storage. Show all posts

Storage Bins: 11 Stylish Options

As some of you may be aware, I'm working on reorganizing my laundry room. Actually, "re"organizing would imply that it was ever organized to begin with, and that may be a huge assumption on everyone's part.
 
Ahem.
 
So I've been scouring Cyberville for storage bins and containers, and I'm finding some good options - everything from plastic storage bins to woven to fabric and in between. While I've narrowed some down for myself, I thought I'd share some of the things I've found. Nothing ground-breaking here, I know, but it might save you a few minutes if you're in the market for some storage containers of your own. 


$4.99 for a basic fabric storage cube with grommet handle (on mega-sale down from $11.99)

ShopKo
 
 This woven number looks awesomely sturdy, and I love the greyer tones. But at $49 a pop, I don't think it's the right option for me. (I'm going to need a bunch!)
 
Fabric storage cubes are always a great budget option, like these two (below) for $9.99. Multiple colors to choose from.
Target
Ikea is hard to beat when it comes to affordable storage options, and this woven BRANAS cube for $12.99 is no exception.
 
For a kids' room, maybe? I like the woven-ness of this one, and for $8.95, it's not bad. I just wish the color selection was a little broader. 

 
Ikea does it again, this time in the MAGGA for $7.99 - a bit of a chevron in a roundish shape? Love.
Ikea
 I'm going to admit that this one ($21.97 for six) (SIX!) is definitely in the running. Especially for a laundry room, where moisture plays a factor. Not super glamorous, but functionality can be glamorous by its very nature of being functional...right...? 
 
 
WalMart
 
Hello, lovelies. Come home with me. You can call me Mom. $16.95 for the smaller one.
CB2
 
This one is my very favorite of them all. Nothing is quite as chic and awesome as a grey wool perfectly squared off box. It speaks to my soul. (And also, apparently my soul is a bland old granny who eats oatmeal every morning.) (So be it.) $16.96
CB2
 
 
Not bad. A fun, colorful box right here that looks well-made, and at just $15, it would be hard to pass up.
JCPenney
 
Okay, so it's nothing crazy-cool, but at $2.99, this basic fabric storage cube is hard to pass up.
KMart
 
So. There you have it. Any other ideas of great and cheap storage bins?
Pin It Now!

How I Organized My Junk Closet

So...You guys know that junk drawer that everyone has? You've got one, too, right?
 
Well, I see your junk drawer and raise you a couple random bookshelves and a miscellaneous (translation: filled with heaven knows what) closet. BAM. Chip me, please.
 
So, here's the deal. In preparing to redecorate our basement guest bedroom recently, I had to first do some closet organizing. Our house is not huge; it actually feels like we never have enough storage space. My knee-jerk reaction to this thought of "organizing the closet" was to go out and buy a new bookshelf.
 
Because bookshelves are supposed to solve the world's problems, right? I'm pretty sure if nations' capitols had more bookshelves (and maybe more cookies), political grumblings across the globe would quickly subside. Because who isn't happy putting stuff on a shelf while eating a cookie? No one, that's who.
 
(ahem) ANYway. I started pulling stuff out of the closet and in about 5 minutes realized that the problem to my shortness-of-storage dilemma was not inadequate bookshelfery. Rather, it was disorganization and randomly strewn about junk treasures items that needed to be edited and compacted.
 
So. I'm no professional closet organizer (despite the above photo's showing I might be Prez of the Closet Organizers union) (har har). But here's how I got rid of this mess, complete with some closet organization ideas for you all:
 
 
Step 1: Relocate large items on the closet floor so I could access everything else in the closet. This included moving Rock Band items (into the furnace room), luggage (into the food storage room, top shelf), and filing cabinet.
 
(Tip: When looking for storage, try to notice places in your home that you normally overlook. Do you have a shelf holding empty boxes? Two closets holding the same thing? Bins full of random items that you really don't need taking up valuable real estate? See if you can shift items and repurpose a space or two. This also helps to pare down the Stuff in your life. Bonus.)
 
Step 2: Go through contents of filing cabinet and de-junk. I was able to recycle an entire curbside recycle can's worth of papers in doing so. I also painted the filing cabinet and, because it was now more aesthetically acceptable, moved it to our home office space.


(Tip: When you find yourself running out of storage space, see if there's a way you can make large items look presentable on their own so they don't have to be hidden away.)
 
Step 3: Combine like things with like things. For me, it was my sewing/fabric-related items. I described the process in this post about reorganization. This freed up the two large center shelves in this bedroom closet.
 
(Tip: Consider storing related items in one central place rather than several spots around the house. This is beneficial when you go to use these items, too.)
 
Step 4: Move a smaller (unused) bookshelf into the closet and designate this the "camping section." I positioned it against the side of the closet wall to free up more space.
 
(Tip: Consider non-traditional layouts to optimize storage space. Simply turning a bookshelf 90 degrees, for example, can give you several square feet of space that you previously didn't have.)
 
Step 5: Store some seldom-used items (such as foam pads) under my children's beds.
 
Here's the reorganized closet:
 
 
Can you believe the extra empty space? I can't. I CAN'T. Because I live here and know that we don't have extra room for stuff. And yet, here it is. Before my very 20/20 vision eyes.
 
And that, my friends, is the power of reorganization. Organizing with a purpose. Editing the junk. Fearlessly tossing the stuff you don't need. Finding new uses for space. Realizing that if it doesn't fit, you need to prioritize and then get rid of the stuff that falls lower on the list. Maintaining the status quo of Stuff in your life.
 
Here's the closet without all those pretty (hah!) red words and circles:
 
 
Now, I know it's not super pretty; my intent wasn't to create a blog-worthy closet. My intent was to maximize, fully and completely, the storage and organization of this space. And, for the time being, that mission is complete.
 
At least, until I get a killer deal on high density foam...or kids' sleeping bags...or large art frames...
 
Pin It Now!

Campaign-style Filing Cabinet

So, due to a major de-cluttering and reorganization of this closet, our old metal hidden-away-because-it's-a-hideous-beast of a filing cabinet had to be relocated out into the computer corner of our family room. Our "office space," as it were, was about to be invaded.

Which means...super ugly. In our family room. Hauntingly, nightmarishly present. Nope, can't do it. Something had to change.

And that something involves an old government-issued metal filing cabinet, some frog tape, and some paint to turn the ugly thing into a pretty great campaign-style piece of furniture. 
 
Sure, it's not going to knock the purist-style antique-collecting neighbor's vintage knitted socks off (what, you don't have one of those? strange), but it was a free project and easy to do. And it ended up looking like this:
  
 
 Which may not be that impressive until you take a gander at what she started out as. Here's her original look (back side):
 
 
A lovely puce hue, wouldn't you say? (Bleck.) The drawers:
 
 
And some textured nastiness in the top corner:
 
 
There was tape all over the cabinet, but it was taking way too long to try to peel off, so I busted out my trusty adhesive remover from this wooden trunk makeover project
 
 
First things first: take that high quality government-issued sign off (good to know our trusty government keeps track of classified info via scotch-taped signs. phew. makes me feel safe), because we now actually do have suuuuper secretive information to file away in here.
 
Like blackmail-fodder photos from our awkward years. (Coincidentally, mine spanned ages 5-21...)
 
 
Ahh, much better. That goop (and some original paint) swiped right off the corner here:
 
 
Take all fixtures off the fronts of the drawers. Paint fixtures gold. (Optional: Use a glitter-coated drop cloth. Fancy, no?) 
 
 
Here's where the photo montage takes a turn for the worse...I have literally no photos of the rest of the painting part. Ooops. But I can 'splain it in about three steps. Ready?
 
1. Paint the piece whatever color you want. (I had loads of paint + primer left over from another project, so I rolled that on everywhere.) Let it dry.
 
2. Reattach freshly painted (but dry) drawer fixtures, and put drawers back into the filing cabinet.
 
3a. With drawers intact and pushed in all the way into the cabinet, tape off the campaign-style edges however you want (mine: corners are 3" tall and 3" in, sides are 3" tall and about 1.5" in) then paint them gold (or whatever color you used for your fixtures).
 
3b. Remove tape. Let dry. Commence filing of classified 8th grade photos.

 
My apologies, the color balance is suuuuper funky in these photos. The cabinet is a lovely bluey-grey in real life, but it doesn't read as that under the fluorescents in my basement corner.

 
Done and done. A much better addition to our office space now than the goopy-corner-ness that it was previously, don't you think?
 
 
(Quick back-story: Once upon a time a couple days ago, I wanted to paint a modern perky chevron pattern onto this filing cabinet and even started taping it off and then got lamed out because it would have taken FOR.EV.ER. and so I ripped off the three pieces of tape and instead went with Plan B: Campaign-Style Filing Cabinet, which I ended up liking way more anyway because it's less visually "busy" and thus better for my office space. The end.)
 
Pin It Now!

Organization Domino Effect

Oh my gosh. Organizing is the w.o.r.s.t. Don't get me wrong, it feels great to be organized and have everything in its own neat and tidy (and, if you're OCDish, color-coordinated) house. But it stinks to have to actually DO the organizing.
 
At least, it stinks if your starting point looks anything like this:
 
 
That's right. Pity me.
 
But here's the thing. I often (okay, occasionally) find myself bemoaning the fact that our house lacks storage space. In particular, I was bemoaning this closet (above), because it's in the guest bedroom and must be cleaned out a bit in order to make the space function as a true bedroom space instead of a Catch-All Holding Cell.
 
Where in the world is all of this crap going to go?
 
It's like a dominoes effect, really, when it comes to organizing around here. Move some stuff away from here to there, and the stuff from there to somewhere else. One of the hot spots in this organization train was this shelf unit in our family room: 


Upon closer inspection, I thought maybe just maybe we could use the space a little better to maximize storage. For example, this bin could be used for something other than trash:


And these metal brain-game things could maaaaaaybe squeeze themselves into a smaller space (what the what of a waste is this?!?!):

 
And an apron and stuffed animal could be put away. Maybe. Just sayin'.


And BAM. Just like that, three shelf cubes freed up. How dare I bemoan anything when I'm wasting what I've got already?
 
So I relocated toys into the toy closet (novel idea, I know), threw away the junk, and moved fabric and sewing stuff that had been stored in the guest bedroom out to these now cleaned out shelves to become:

 
And I actually *gasp* utilized the boxes. As in, stuffed them silly.
 

I have plans to make a cover for these shelves so it looks better, but for now...I'm content with being organized. The greatest part is that this has freed up these spaces in the guest bedroom closet & bookshelves:
 
 
It's not much, but it's a start. I'm continuing this process of really looking at the items we have vs. the storage space we have and figuring out how to maximize the purpose of both.
 
It's a painstakingly slow and highly un-glamorous task. But definitely rewarding in the end, as I feel like we got a bunch of "free" square footage in our home. Plus it forced me to clean and de-junk, which is always useful. I think 2013 is the Year of Simplifying for me.
 
Has anyone else experienced something like this? Like, the extra space you needed was there all along, it just required a little elbow grease and thought to make it happen? I'd love to hear. Need some motivation to keep the dominoes effect going...
Pin It Now!

Ottoman & Decorators Tape

Happy New Year! I love a new year and a fresh start and I swear this is going to be the year I exercise religiously...starting tomorrow... :)

Ready for the super-simplest (and, frankly, so-lame-it-probably-shouldn't-be-blogged) project known to man? Here:
 
Our family room is home to this big box of a hinged-top ottoman:
 

I rescued it from craigslist last summer, and if you think it's nothing special now, believe you me, it was hideous then. I painted it out in a random light blue I had on hand and quickly (and, if I'm honest, carelessly) reupholstered the top (because not all projects are created equal for me, what can I say) with this fantastic herringbone fabric my friend found at HomeFabrics for like $1 a yard.
 
I just wanted something sturdy that the kids could jump onto or off of, and that would store unsightlies, and that our feet could lounge atop whilst we watch awesome shows like American Pickers on the history channel.
 
Check, check, and check. And a bonus point for casual use of the word "atop."
 
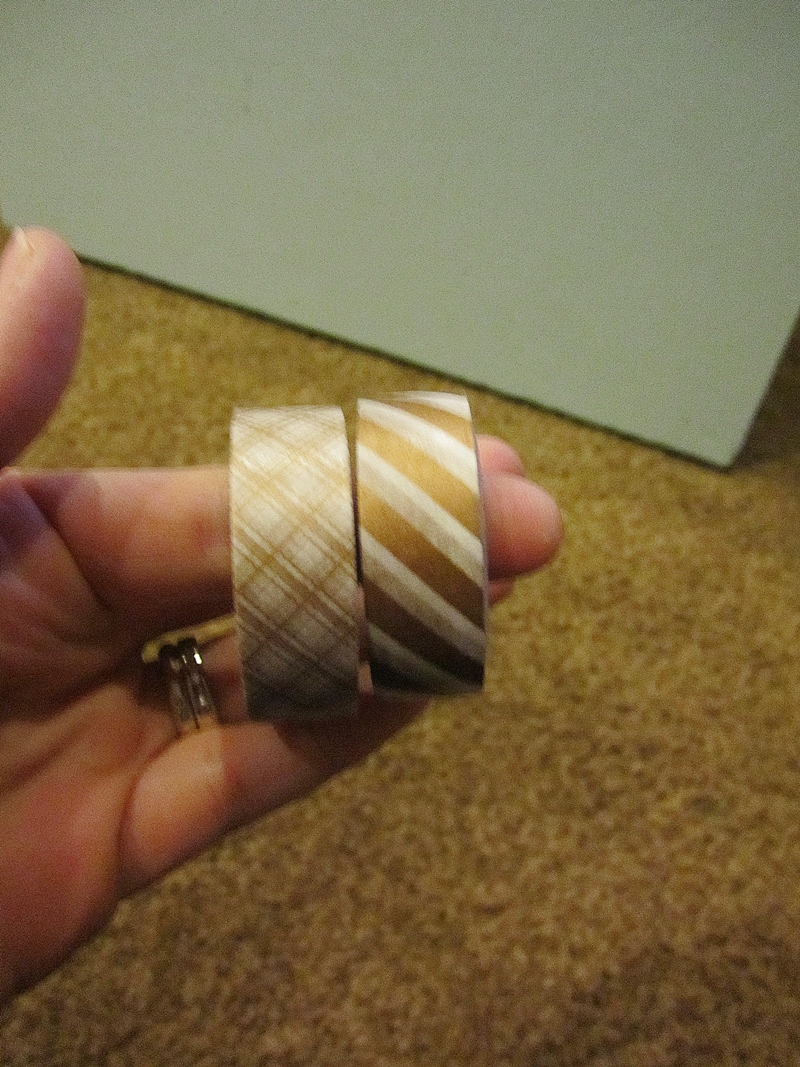
However, I've always felt like the blue sides were a little too, well, mass-o-solid. I had some decorators tape on hand today and thought I'd add a little detail while I watched the kids wrestle their dad.
 
So I took a blurry photo for you all...


...and taped out a frame in about 5 minutes. Kinda wild, what with the diagonals going every which way, but I actually don't hate it with the herringbone.


Then the tape started peeling off a little bit, so I mod podged it back on. Because nothing says "permanent furniture makeover" like peeling tape and mod podge.
 
And if this project isn't the catalyst to a wildly successful and home-improved new year, well, I don't know what is.
Pin It Now!

trunk as coffee table, part I

Remember this guy?
 

I'm the lucky heiress of two of these *matching* carpet-covered wooden trunks from my gramma's house. These things are 30+ years old. My creative gramma had glued on the carpet remnants and used the trunks playfully to hold dressups. I have a zillion happy memories of playing dressups with cousins in her basement. But these trunks have been tucked away in the far corners of my basement because even rose-tinted nostalgia isn't enough to make me love them as-is. No. They must be prettier to win my love.
 
(Criteria applied to furniture only! Not my kids or anybody else! I swear!)
 
I had a thought the other day that they might actually be pretty sweet trunks underneath their shaggy fur. Maybe. Today's the day of reckoning. I started with just one trunk, in case things went horribly wrong. (Which can't be ruled out around here whenever me + tools...)

 
I used a wedge and hammer to peel the carpet pieces from the wood, keeping the wedge's flat side up to minimize damaging the wood. Which, due to the sheer volume of glue applied, was impossible. But I did my best.
 
What's this? Some old wordage painted on the box? Yessss...

 
Here she is about 4 million hours later. Magnificent vintageousness.


But even Cinderella and her mice friends needed a little boost from her fairy godmother. (An apropos metaphor that explains the mouse droppings...ugh and eww and sca-ry!...I found while pulling up the carpet...)
 
Enter my new BFF: adhesive remover.

 
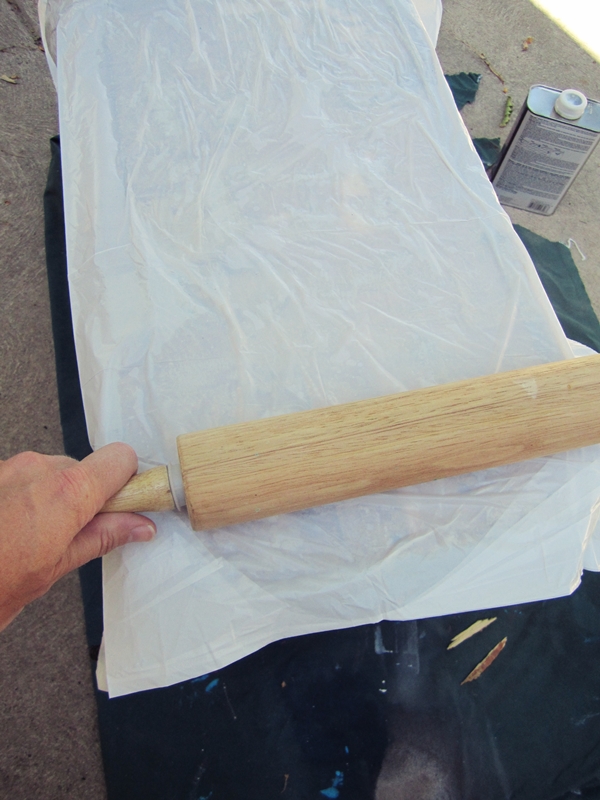
I followed the instructions on the back of the can. 'Cept I used a rolling pin to squish the adhesive around under a plastic garbage bag. And I didn't use gloves. Until one teensy tiny little drop of that stuff got on my skin, and it burned BAD about 1 minute later. So then I got some gloves. And also, I ditched the rolling pin and just used the putty knife to spread the adhesive.
 
Following directions: Fail.
Saving skin: Pass, but with room for improvement.

 
See how nicely the yucky old glue just scrapes away after using this stuff?

 
I wiped the putty knife off onto a paper plate after each pass. Yummy.

 
Note to self: make sure hair is securely tied back before embarking on this project. Mine quickly escaped its pony and proceeded to impair my vision throughout the project. Totally annoying. Learn from me, people. It's why I'm here. (Along with keeping the pnut butter m&m industry afloat, of course.)

 
Here's the trunk top before adhesive remover:

 
Annnd after:

 
(More words! "Time fuzes." I discovered that this was once a grenade-carrying box. So cool! But it does raise a few questions for my gramma...)
 
After the adhesive residue dried, I did a quick sanding of the trunk, being careful not to sand away the words.

 
There she is. Good ol' Chippy the Trunk. Isn't she a cute little grenade box? Love the random blue painted corner.


But can you see how the sides of the trunk, which were exposed over the years, are such a different color than the top and front, which were carpet-covered? I don't love that.
 
Trunk renovation to be continued...

(Addendum: View the completed whitewashed trunk as living room coffee table here. Sneak preview below.)
 
Pin It Now!
Related Posts Plugin for WordPress, Blogger...
Pin It button on image hover