Showing posts with label unexpected and maybe awesome. Show all posts

Ikea Hack (Hemnes) with Cozy Wall Art Decal

This post is sponsored by Cozy Wall Art - creating products that accent the life and personality of a home. All opinions expressed are 100% my own.
 
Most of you guys probably know by now that I have a thing, some might call it a fetish, for customizing Ikea furniture. (If you don't believe me or have forgotten, check out what I did to a Hemnes dresser, Lack table, and Malm dresser.)
 
While I've loved the results of my previous Ikea furniture personalization efforts, I have to say that those projects were waaaay more labor-intensive than the dresser makeover I'm about to show you now. And I love this one just as much, if not moreso.


 Let's start at the beginning. A few weeks ago, Cozy Wall Art contacted me and asked if I'd be willing to do a product review for them. I checked out their website and immediately fell in love with many of their products. The decals are actually designed for walls, but as soon as I saw this one, I knew I had to have it for my girls' dresser as a key part of their bedroom makeover.
 
Why would their dresser need any attention, you might be wondering? Three words: boring. white. laminate.
 

(Continue reading after the jump.)
Pin It Now!

Laundry Room Makeover: Reveal

If you have a huge laundry room, good for you. I may or may not be extremely jealous of you.

I, for one, have a teensy tiny laundry room that also doubles as a mud room, random home improvement products and housewares storage room, garden center, and school stuff dropoff. It hasn't been very attractive for many years (if ever)...here's proof.

Although it's far from the laundry room of my dreams, it's now functional and organized and simple and, dare I say, even a little bit pretty.

Directly to the right of the doorway (barely visible in the photo below), I painted the back of a corner shelves/hooks unit to match the walls and added some grey fabric storage cubes. Each of our children has one to throw their bike helmets and lunch boxes and whatever-else-makes-their-hearts-sing into because, hey, no one can see it!
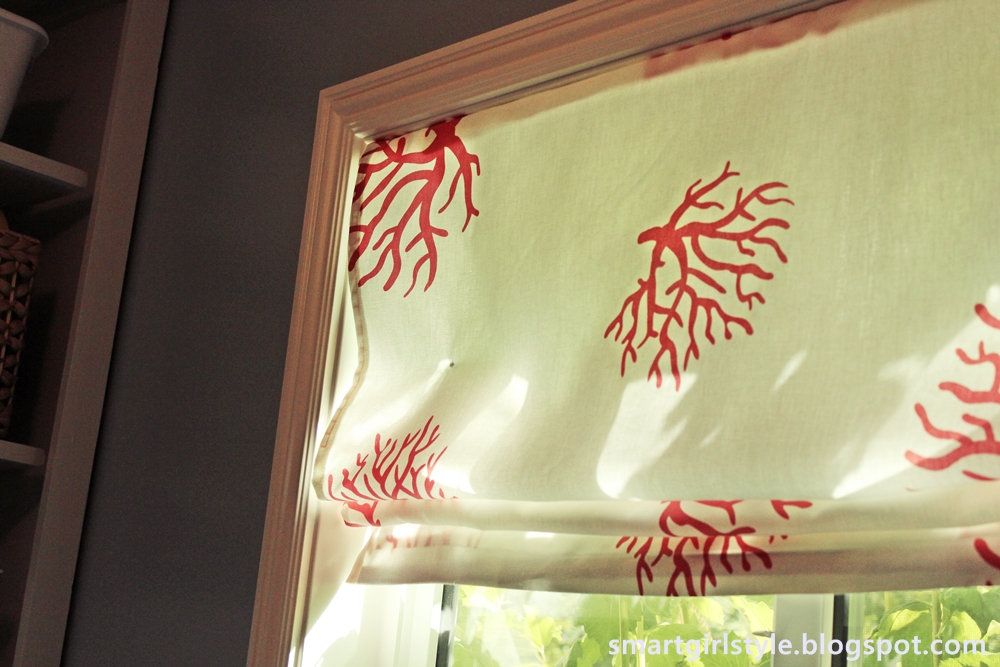
If you recall, we previously had some lame-length curtains hanging here that were constantly attracting dryer lint and getting in the way of the kids' hooks. No bueno. So I took part of one of the panels from my living room drapes FAIL (read all about it here) to create a laundry room window shade WIN. It only took about an hour one afternoon while I watched a What Not To Wear rerun. I absolutely love the funky coral fabric in this space.

Next up: the floor.

Check it (and more!) out after the break.

Pin It Now!

Cobalt Blue Front Door

I was "reading" a book on how to build sheds the other day, when I came across an image that has stuck with me ever since.
 
It was of this quaint old shed, goldish-yellowy-orange, with a cobalt blue door and window trim and a plethora of red flowers in pots all around it. I'm sorry I don't have a pic to share, but trust me. It was warm, fresh, inviting, and exuberantly unapologetically colorful. Loooooove the cobalt.
 
 
I decided yesterday that, frankly, front doors are huge. I mean, their impact and their ability to set the stage (or not) for the home.

On that soapbox note, here's the dreariness that greeted people to my own home for the past (insert embarrassingly high number) years:
 
 
The weird part is, the people who live inside actually do have personalities! And aren't color blind! Although the random passerby would have no clue about either case.
 
I've actually struggled with customizing our front door space for a while because the rock is a bit dated and represents a color scheme I'm not big into, but it's permanent as far as we're concerned. I also wanted a replacement front door with glass, for more natural light inside. But that would lend zero privacy to much of our upstairs, and that wasn't a great option.
 
What to do, what to do.
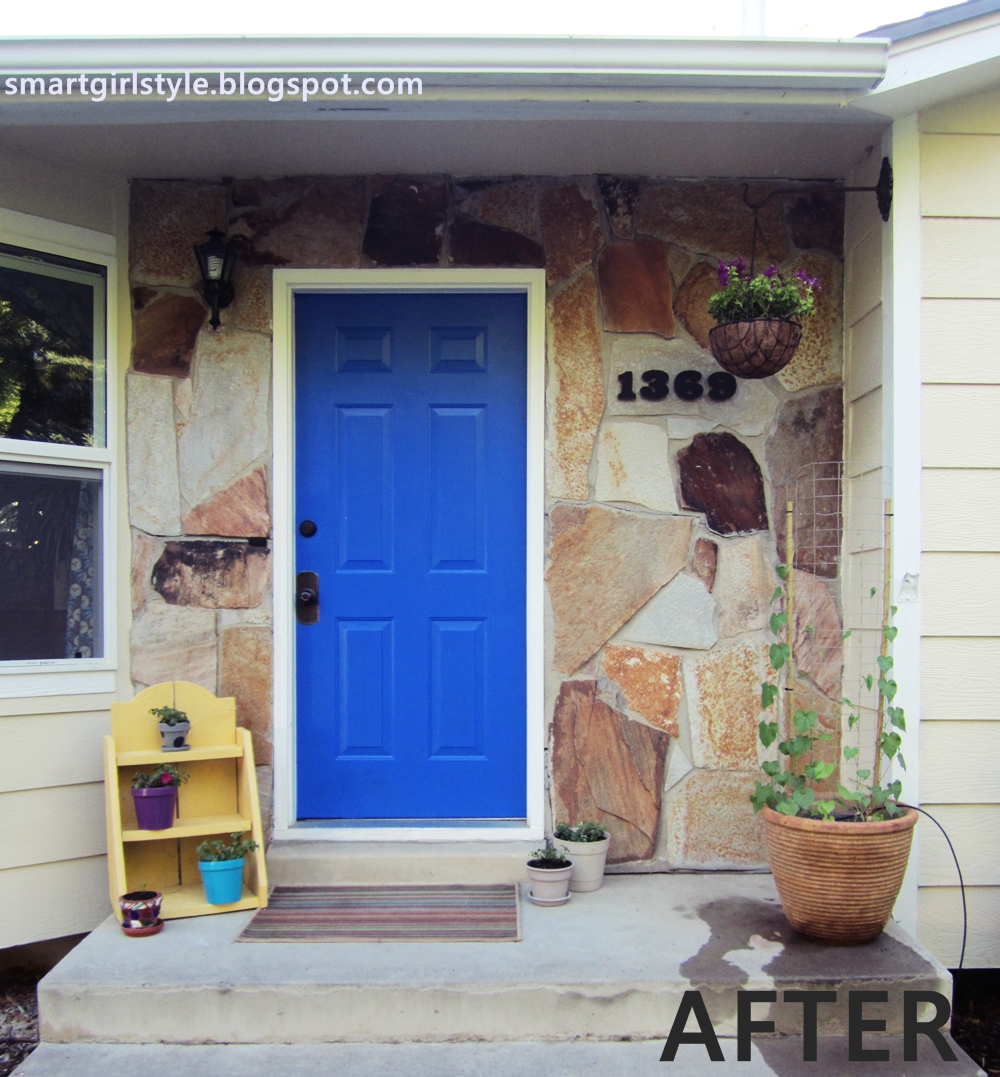
What I did in the end was paint the door and ignore the rock altogether. Pretend like it's not there. Because I'm nice like that.
 
So. A quick coat (or three) of blue, and you can see immediate life starting to stir within. Or without. Whatever. Not so happy were the wooden house numbers straight from the 80s. I painted them the same color as the door (obv) but soon realized my mistake. Wowsahs. 


I bought some great contemporary house numbers from Home Depot and was going to hang them up, but I chickened out because (a) I'd be mounting them into stone, and I've never done that before, (b) I couldn't even figure out how to take the old numbers off, and (c) I was going to royally screw up the whole thing. I mean, it's kind of a prominent place to be debuting a hammer drill.
 
So I brushed a few coats of black paint over the numbers to tide us over until I could work up the courage to deal with stone and drills and scariness like that. It's not great, but it'll do.
 

Watered some plants, which I realize now makes for a not-so-lovely photo detail. Dah well. I also had some leftover exterior yellow paint from another project, so I gave this sad pot spot a buttery facelift. (mmmm...butter...) And swapped out the welcome mat for a rug I had on-hand until I fall in love with something else to replace it.

Looking better.
 

I thought some color up top would be nice, so I dug up an old hanging basket and hung it from a metal planter-holder-upper thing mounted on the side of the house. (Didn't like how high the flowers would have been if hooked from the ceiling.) I potted some petunias and am sending them all the green-thumb vibes I can muster. Which is about two, total.

 
The lone impatien. Grow, friends!
 
 
And here we are again:
 
 
Still some things to do (like deal with that drip hose and get the flowers to bloom, baby, bloom), but I like where this is headed. It's out there, it's wild, it's bold. But what about you all? Are you a yay or nay on colorful front doors?

{shared: A Glimpse Inside, A Jennuine LifeBe Colorful, By Stephanie LynnC.R.A.F.T., Chic on a Shoestring Budget, Coastal Charm, Craft-O-Maniac, Crafty Texas Girls, DIY by Design, DIY Dreamer, DIY Showoff, Domestically Speaking, Dragonfly Designs, Finding Fabulous, Fireflies & Jellybeans, GingerSnap Crafts, House of Hepworths, I Should be Mopping, Ivy and ElephantsJembellish, Lil Luna, Mercy Ink, My Girlish Whims, My Romantic Home, My Uncommon Slice, Not Just a Housewife, Sew Can Do, Simply DesigningSugar & Dots, Sumo's Sweet Stuff, The 36th Avenue, The Shabby Creek Cottage, The Shabby Nest, The Style Sisters, }
Pin It Now!

Bedroom Makeover: Nightstands

Guest Bedroom Makeover
Day 7: Nightstands (or "How to Make a Rolling Pallet Board Side Table")

**Note: This is part of a 12-step bedroom makeover series. Find the previous steps at the bottom of this post.**
 
Due to space constraints in the bedroom, I decided to DIY a custom-sized nightstand.
Due to budget constraints, that nightstand is made out of pallet boards (read: free!).
Due to technical constraints, you won't hear me weeping over how much I love the result.
(I know. Thank you, technical constraints.)
 
 
[Due to the overload of photos, click through for the full tutorial. Sorry for the hassle.]

Pin It Now!

Bedroom Makeover: Curtains

Guest Bedroom Makeover
Day 6: Anthropologie-Inspired Curtains

**Note: This is part of a 12-step bedroom makeover series. Find the previous steps at the bottom of this post.**

K, not a ton to say here, so I'll be brief...and if that concept isn't jaw-dropping, I don't know what to say. Which should make me even more brief, which would cause your jaw to drop even closer to the floor... Isn't this a fun never-ending cycle of brevity opposition.
 
So. I really like these curtains from Anthropologie. They're friendly, fun, and bee-boppy. (Nope, not an adjective. But if "bee-bop" could be used more often and in more grammatical functions in the world, communication as we know it would be enhanced. Just sayin'.)
 
 But, no shocker here, the $100ish pricetag for the curtains was a little too steep for me. So I recreated them using 10 yards of pom trim (ebay) and a white flat sheet I had on-hand, cut in half vertically.
 
 
Then I hung the two panels from a rope just for something playful.
 

I happen to love it, what can I say. It's all unexpected and maybe awesome.
 
Speaking of awesome, you should totes come back for Day 7: Nightstands. Yep. Totes.
Check out the previous steps to this bedroom makeover:
Day 2: Paint Walls
 
 
Pin It Now!
Related Posts Plugin for WordPress, Blogger...
Pin It button on image hover