Showing posts with label holiday. Show all posts

Christmas Decorations: Bows

Bows. We put them in hair, we put them on gifts, we even put them on our car grilles. (Okay, we maybe don’t put them on our cars, but we’ve all seen it done. That counts for something.)
 
The truth is, bows have been around forever, and it’s for a reason. Bows can provide a polishing touch to whatever they’re put on…and they often provide a bit of heart-warming nostalgia as well, which is never a bad thing, especially during the holidays. You might want to consider adding a few bows to your décor this season – inside or out, it’s never too late.


  Welcome guests to your home with some oversized bows atop miniature Christmas trees. Keeping the tree décor restricted to the bows alone helps this look not be too overdone, although the stars on the silver buckets are a festive and unobtrusive addition.
source

Large red bows on your green garland on the stair railing is a classic look. And the thing about classic looks is: you can’t really go wrong with them. Ever. Add bows to both ends of the garland (start and finish) and a few places in the middle.
 
source

Hanging a simple boxwood wreath (or a greenery wreath of any kind, for that matter) is a hallmark of Christmas décor. (Psst - it's not hard to make your own boxwood wreath.) You can customize the look with an oversized satin bow and hanging ribbon. Keep the bow ribbon light and neutral for a fresh, modern look.
 
source

 A perfect and unique idea for a holiday dinner, or just to dress up your dining room for the season, is to tie bows around each chairback. This is particularly striking against white slipcovers, although the bows would look well against any color (and type) of chair.
 
Centering a large bow on your mantel garland is a good way to capitalize on the attraction of symmetrical décor on a naturally symmetrical feature. This one isn't exactly to my taste, but I can certainly appreciate the holiday spirit behind it. (But, for the record, that brass-legged coffee table? Yes, please.)
source
 
We’ve all seen stars or angels or other items atop a tree (which are lovely), but if you’re looking to freshen things up one year, you might consider adding a bow as your tree’s finishing touch. This is an especially sweet look in a rustic or country styled Christmas space.
source
 
Or, if you really like your figurine on top of the tree, maybe decorating the tree itself with bright, cheery bows is the thing for you. Contrast bright satin ribbons with something natural, like pinecones or, in this case, dried hydrangeas.
 
What about you? Do you like adding bows to your Christmas décor, or is it not your style?
Pin It Now!

Bits of Christmas at my House

I usually keep Christmas décor pretty simple.
 
 
I visited Sweden a few years ago while my parents were there for three years and picked up some Tomta. (Don't know about the spelling. But I love their hidden faces all the same.)
 

I will forever love Swedish style and décor.

 
Below is my kids' favorite advent activity each year: Mini felt stockings that hold mystery treats for the 12 days leading up to Christmas every year. Made by my sis-in-law, this was the greatest handmade Christmas gift for a family with young kids. Ever. In the history of the world.
 

Happy Friday, friends.
Pin It Now!

Merry Christmas.

Have yourself a merry little Christmas.
I hope you find yourself with people who love you as much as you love them.
 
 
xox,
Brittney
Pin It Now!

Christmas Musings

My parents spent a few years in Sweden recently. These guys (Tomten...give or take the spelling) are from there and make me oh so happy.


As do these candles, which have been a part of every Christmas of my kid-dom.
 
 
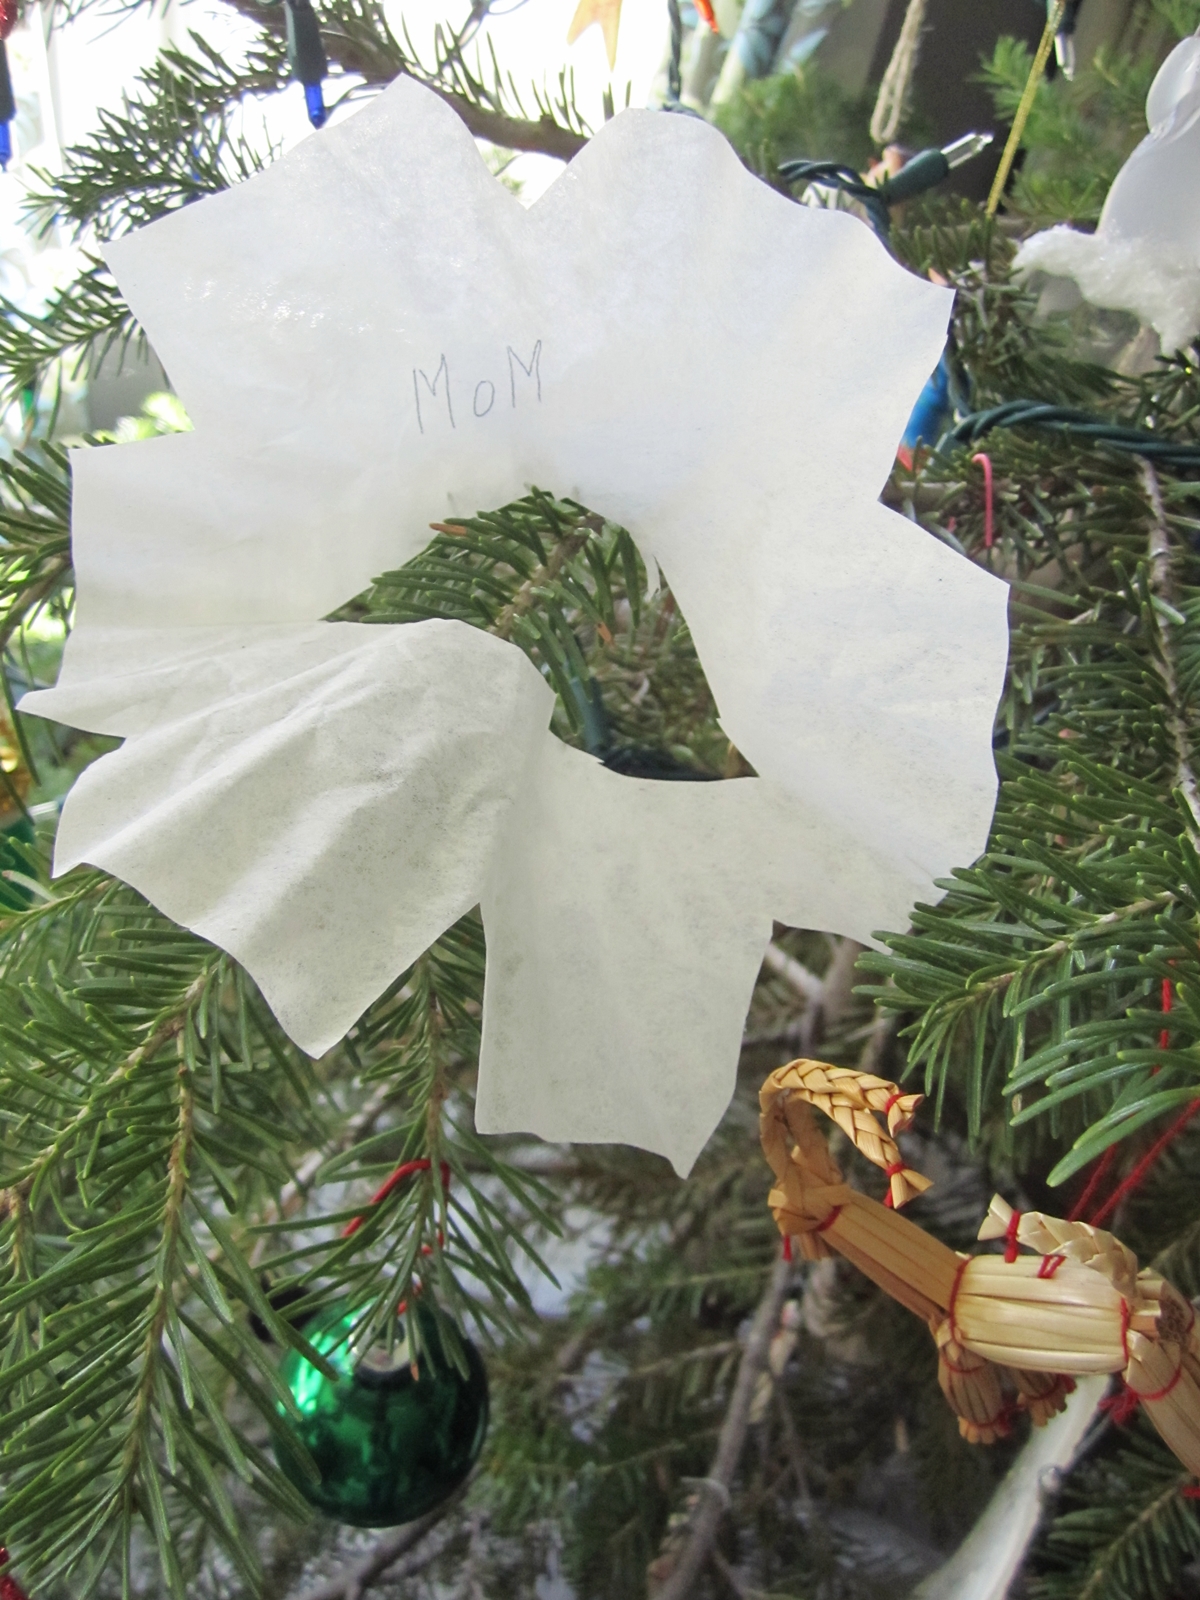
And look what I spied bedecking a branch on our tree the other day?
 
 
A snowflake personalized by little hands as an homage to yours truly.
 
Ever feel super duper blessed?
 
Me too.
 
Happy weekend!
 
xox
Pin It Now!

Christmas Tree Centerpiece (a la J. Crew)

So, I doubt you'll remember, but my friend and I were in charge of decorating for a large Christmas dinner. (Original inspiration board here, although we veered from that.)
 
Our budget was verrrrry small. It's not easy to decorate a gym (at all, let alone) on a very small budget. So, inspired by J. Crew's crew cuts catalogue, we went total handmade-vintagey. We're talking cardboard trees and tissue poms and glitter here, friends.
 
And I couldn't love the results more.
 

Here's what we did:
 
Start by collecting some cardboard. We found ours outside a Sears store near the dumpster. (First we double-checked with the guys inside that it was okay if we stole it. They quickly gave us the thumbs-up.)
 
We determined tree sizes (super narrow and tall but not so tall that you couldn't see the people across the table at dinner). I think we went with 20", 16", and 12" heights, and maybe 6", 5", and 4" base widths. Ish. Scored and then cut the triangles in this cut-effective way, where one cut worked toward two triangles:

 
(Because, really, raise your hand if you could live a long happy life without ever cutting out cardboard. Mine's raised, for sure. And I'm even typing, so that's not easy...)
 
You'll end up with lots of pieces like this:

 
Take half of the triangles and cut cardboard-width slits into the top half. Take the other half of the triangles and make slits into the bottom half (shown below):


(The slits will be where the two triangles slide into each other to create a free-standing 3D tree.)
 
Lay out all triangles to prepare for spray painting.


Spray onto 2-3 trees at a time (I used Krylon gold metallic), then quickly drizzle gold glitter onto the wet paint so it sticks.

 
Let them dry, then flip them over and repeat on the other side.
 
Some of the glitter will fall off (as we all know glitter is wont to do), but most of it should stick if you're careful in handling them and if you got the glitter onto the paint while it was still wet.
 
Assemble the trees. Looking kinda cute in their little forest-y setup.

 
Cut about an inch off the tops of the trees so they're flat. Use hot glue to attach little pom-pom tissue paper balls as "stars." (Check pinterest or google on how to make these.)
 

We did three per table, one of each size. Love love love them. The photos don't do their cuteness justice. We used real pine boughs and fake candles (votives) for ambiance, and I love how the light flickers off the glitter.
 
Here's a "daylight" shot. Not as magical, I know.

 
Pin It Now!

Display the Christmas Letters You Get

Continuing on with my keep-it-simple, keep-it-festive, keep-it-free holiday decor scheme of this (and, let's be honest, every) year, I'd like to share with you what we do with the Christmas letters we get each year.

(This is different from the kind of Christmas card discussed & displayed here.)

Get ready for this. It's genius. It's never-before-seen* footage.

*Except probably at your aunt Mable's house. And your two-doors-down neighbor's. But other than that, never.

Ta-da:
 

Attached by paper clips onto our twinkly-lit, garland-entwined railing in the entryway. 
 
 
Because the kids like seeing their friends' and cousins' faces every day.
 

I took this pic early in the season, when photo-card real estate was spacious. In about a week, this thing will be deliciously, delightfully, lovingly jam-packed with faces of loved ones.
 
There's nothing better than the everyday reminder that people you love love you right back.
Merry Christmas to us all.
Pin It Now!

Natural Winter Decor Soothes the Crazies

Life's super crazy right now. Delightful and happy, but crazy.
 
I have some lovely projects going on and can't wait to show them to you. Remember this dreaminess? I started making these for my girls but added a twist...a twist no one will be surprised at, frankly, but it's turning out pretty great.
 
Which is always rewarding on a DIY adventure, don't you think? I hope to be able to share it with you all very soon.
 
In the meantime, though, here's some lovely natural wintertime decor to soothe your soul at this often chaotic time of year:


See you all tomorrow.
 
xox
Pin It Now!

Christmas Card "Art"

(Note about the Title: Sometimes I think I might use the word "art" a little too freely. Like this morning, when my waffle syrup resembled a wagon, I proclaimed it "artistic" and showed it proudly to my children. It's hard to say whether or not they were impressed, but if blinking and silently putting a forkful of their own waffle into their mouths counts as "impressed," then, by jove, they were floored.)
 
So. Keep that in mind through the duration of this post. BUT I will say, this is one of my (and my children's) favorite decorations of the holidays year after year, plus it's versatile, plus it's free, equals I'll share it with you.
 
I love getting Christmas cards, but sometimes I feel bad throwing them out after the season's over. One Christmas a few years ago, we received several cards with snowmen on them. On a whim, I stuck some painter's tape on the backs of them and hung them on a wall.
 
 
For some reason, those cards got taken down and put into the holiday decor box. Pulling them out the next year, I had to smile, and I hung them up again. And even got another card or two to add to the collection. (Thematic: snowmen. Randomly, last year, a glittery Christmas tree was added because my girls fell in LOVE with it. But otherwise, the collection is strictly snowmen.)


So now, every year, we save our cute snowmen cards and add them to the pile. The cards move from wall to wall every year, so my kids never know where it's going to end up. That's part of the fun.
 
(I know, I know...you're right, we DO need to get out more.)

 
This year they ended up in the entryway, at kid-height-eye-level.
 
I like this Christmas card "art" because it's something so simple that brings my children joy, which brings me joy.
 
What, if anything, do you do with Christmas cards?
 
p.s. Are you guys sensing a theme of my Christmas decorating style? If not, check out some evidences of how I keep things pretty simple, pretty kid-friendly, and pretty free.

Pin It Now!

Burlap Tree Skirt: No-Sew DIY

Let's pretend you have an old tree skirt that you don't love, about a yard of burlap and red fabric, and 25 sticks of hot glue gun glue that you don't know what to do with. Oh, and a naked Christmas tree. And also two hours. And a handful of cookies.
 
If I just described you, go buy yourself a lottery tickey (you'll only need one) because today is your lucky day. (Actually, you better make it two.) (Okay, fine, maybe three. But three really should cover you for some big winnings.) Because those are the only ingredients you need to make a no-sew tree skirt just like this one:
 
 
(I supPOSE the cookies might be optional. But barely.)
 
Let's start at the beginning of this very short and, let's be honest, probably boring tale.
 
Recently, someone handed-me-down (handed-down-me?) this tree skirt:


It wasn't quite to my taste, but I didn't turn it down because...well, I just didn't. I thought I could make it work somehow. And that "somehow" became today. With chunky stripes of burlap.
 
(We scour the forest and cut down our own tree every year, which is a great tradition. However, these trees are much sparser than artificial ones, and a tree skirt definitely shows up.)
 
I started by cutting lots of strips (probably used about a yard of each fabric) about 4" wide. You probably all know this, but just in case you don't: to cut burlap straight, make a snip on the edge and then pull a single strand all the way through the full length of the burlap. That opens up a straight line wide enough to cut.


K, so now we have lots of red and burlap strips. Perfect. I flipped my tree skirt over and started hot gluing the burlap to the quilted side. You'll figure out a method that works for you, but basically what I ended up doing was laying down a line of hot glue about 6-8" long on the existing skirt, gluing the strip to it (while leaving a little extra fabric/burlap at the top as a "pleat"), then gluing down the pleat.


I started using a weight (rather than my fingers) to hold down the freshly glued pleats while I moved on to the next 8", and that worked well.

 
Around and around. My circles had gotten a little off by the time I got to the top/inside of the tree skirt. There was an awkward space there -- too much to be covered by one ruffle, but not enough for two ruffles all the way around. So I glued down some red fabric to hide the white skirt and did my last red ruffle on top of that.

 
Then I decided that I actually had a little more space than I thought but just a small strip of burlap left, so I added a "half" ruffle. (An exact science, this ain't.) I did make sure that the top ruffle was centered to the front of the tree skirt. *gold star*

 
Here she is:


And look what cuteness I spied: my sweet 6-year-old daughter already leaving Christmas gifts for everyone under the tree.

 
Welp, there you have it.* I'd highly recommend this project. It's inexpensive (free!), and the end result is delightful.
 
Happy burlap-ing.
 
*Addendum: I just saw a verrrry similar skirt like this on Pinterest. Hooray for great minds thinking alike!
 
Featured!
IhookedupwithHoHlamespice  


Pin It Now!
Related Posts Plugin for WordPress, Blogger...
Pin It button on image hover