Showing posts with label kids. Show all posts

Cabin Love & a Vintage Desk

I'm a few days late, but this past weekend was a magical one for our family. Nothing earth-shattering happened, but because our kids had a 4-day weekend and my husband Paul got Monday off, we had lots of family time.
 
Much of it was spent at this little slice of heaven up the canyon:
 
 
At the cabin, we read, watched movies, cozied up by the fire, went extreme sledding and exploring outside, colored, drank hot cocoa, watched the river and woods through binocs, and maintained a solid and impenetrable Zone Defense in keeping Violet away from the hot fireplace. If that's not heaven on earth, I don't know what is.
 

You know how all cabins have interesting (often old, but new-to-you) things to read? Carson found and got sucked into Kipling's The Jungle Book about 3 minutes after arriving. I love his love of reading.

 
Anyway. Since getting back home, rather than frantically trying to get something squared away for this blog today, I've done mountains of laundry, made cookies for the kiddos (tried a new recipe rather than my delicious tried-and-true standby...bad idea), cleaned house, exercised (twice!), and snagged this beauty of an antique double-desk for the girls' room:
 
(Photo from online posting.)
 
It's (almost) exACTly what I've been searching for! (Not that this setup wasn't genius, of course.) (*cough*)
Sturdy and vintage and fits my two busy-creatives and practically perfect in every way. The deep aquaish color in this photo doesn't do it justice; the real color is perfect and with the great patina of age and use.
 
And the most amazing part is that there is nary a speck of fingernail polish to be seen on this puppy. Which, if you ask me, is nothing short of a modern-day miracle.
 
So, yes. It's bound to be a good fit for the girls and their bedroom, I can feel it in my Insanity-workout-brutalized bones.
 
Happy Wednesday.
Pin It Now!

Create a Custom Weekly Chore Chart for your Kids

Hi!

Raise your hand if you watched the SuperBowl yesterday.
Raise your hand if you didn't care so much about the game itself but enjoyed watching the SuperBowl commercials yesterday.
Raise your hand if you sat in the room with your husband and father-in-law during the SuperBowl yesterday and pretended to care but, instead of the game, you watched the clock because you were anxious to use the TV to finish up Season 2 of Downton Abbey on dvd.

My hand is raised for one of those. I'll never tell which one. :)

Switching gears: As parents, Paul and I feel it's important to teach our kids about hard work and also about how to handle money. It seems like we've tried ev.ery.thing. to organize a chore/allowance method but, unfortunately for our household, couldn't find any chore chart ideas that worked for more than a week for one reason or another.
 
Our older kids (now ages 8, 6, and 4) have recently set big goals about things they want to save up for and buy. So Paul and I knew we had to get serious about figuring out a successful chores chart and allowance system. We also knew it couldn't be a fancy, complicated deal or we wouldn't stick with it.
 
So I created a super-easy, customizable clear vinyl modifiable weekly chore chart for our three oldest children. It features "pockets" where chores/responsibilities can be added, removed, and swapped out as needed. We've had it up and running for a little while now, and I must say, it's working. For all of us. We're so pleased.
 

If you're interested in doing something similar at your house, here's how I made it (with an explanation of how we use it):
 
Decide how big you want your chore chart to be. Ours needed three columns (for each "working" child) and about 10 rows under the names. Cut two pieces of clear vinyl to this size. (I got 2/3 of a yard of vinyl at JoAnn's for mine and have extra.)
 
Take one of these vinyl pieces and cut it into horizontal strips about 1-1.5 inches high (or whatever size you want, really). These will be your "pocket" rows.
The other piece of vinyl, which you've left intact, will be the back of your chart.
 
 
Take one of your vinyl strips and sew just the bottom edge to the bottom edge of your larger vinyl piece. (I used a large zigzag stitch with a small stitch size.) Lay a second vinyl strip above that and sew just the bottom edge of the second strip to the larger piece. Make sure you leave enough space between rows that you don't accidentally sew the top of one row closed as you're attaching the bottom of another.
 
 
(I apologize for the photos...clear vinyl isn't the easiest to photograph.)

Finish attaching the bottoms of all the strips to the larger vinyl piece. (Because of the slight spacing between rows, you might end an extra/unused strip.) Then sew up the two sides of the thing overall. You should have something that looks like this:

 
Next, you'll want to create your columns. Because mine is for three kids, I sewed mine into thirds. You can measure, but I kind of eyeballed mine. In fact, I eyeballed this whole project. Doesn't have to be exact!

 
You should end up with something like this, where each rectangular "pocket" opens up at the top:

 
A lovely pocketed organizer to fill with whatever your heart desires. We desire slave labor around here. :)

 
Ours includes (from top to bottom):
- Child's name (in white)
- Kitchen duty day (in blue)
- Everyday chores (in orange)
- 5 money-earning chores (in green)
- Bonus chores for extra money
- and some slots for extra chore cards, blank chore cards, and seasonal chore cards. As kids get older, these rows may be used for additional chores.

 
These chore slips will be swapped out each Saturday, after chores are completed and earnings are noted. Payday will be once a month (because I rarely keep the right cash on-hand).

 
So, it's nothing fancy, but it works for us. And, bonus, it helps our house get clean...ish.
 
I'm interested, though. What method(s) have worked for you for teaching your kids about jobs and money?
 
Featured!

Pin It Now!

Captain Snooze

Hey-o! It's a winter wonderland around my house.
 
 
Despite the hundreds (thousands? millions? yes. prolly millions.) of pounds of snow we've had to shovel in the past couple of days, I couldn't be more thrilled. It's magical.
 
 
I'm going to be honest with you all. (Unlike the times I lie to you photographically and make you think my house is clean. Ever.) I'm still on vacation mode. Big-time.
 
 
It was my birthday on Christmas Eve. My husband surprised me with a new camdamera. I've been a photog-shooting junkie since. Old basket? Gotcha. Leaf in a tree? Sure, why not.
 
 
Of course, the photos would be way more impressive if I was professional already. I ain't. But that doesn't stop me!
 
 
Please forgive me, friends. I'm pushing the bloggy-snooze button. Just a few more days, kay? Then I promise I'll be back in real action. But for now, I just can't get enough of these four little dudes:


Have a lovely weekend!
 
xox
Pin It Now!

DIY Elfy-Felty Stockings

We don't have a fancy Christmas scheme around here. Don't get me wrong, a coordinated decked Christmas hall is beautiful...but it's just not what my family is about right now. To each our own, right?
 
I made some stockings out of felt a bit ago. I like the whimsy and elfishness of the shape and the bright colors on each one.
 
 
They're not perfect, as I don't claim to be an expert embroiderist. Or even an amateur one, for that matter. But if you like them and want to make something similar and end up using these for ideas and they bring you joy like they've done for my family, well, then, Merry Christmas to us all.
 
Oh, and the toes are reinforced with wire and cardboard because, turns out, the elfish point doesn't exactly adhere to the laws of gravity on its own. And I wanted the elfish point above all -- that's my favorite part about these puppies!


Pin It Now!

Make a Tray out of an old Photo Frame

Happy (?) Black Friday! May the deals you found bring you joy and sleep.
 
Want to see what my kids are giving my parents for Christmas this year?
 
(Don't worry. We're currently visiting my parents, who live in another state, for T-day, and chances are about 95% that they open their Christmas gifts before we leave here. I for one can't keep a gift a secret, and my children inherited the faulty gene.)
 
Drumroll please. Or not. You can read ahead in silence, if you'd like.
 
His and Hers snack trays (a.k.a. "Bed Trays" around here...so you can eat snacks in bed, of course!) made out of two photo frames.
 

The three oldest kids designed and colored two pictures, one for gramma's tray and the other for grampa's tray.


My 4-year-old was adamant about the tray handles she picked out. I tried to show her other (*cough way better cough*) options at the store, but she wouldn't budge. How much do you argue with a preschooler when she is conVINCED that her grandparents will love her picks?


Answer: Not at all. Because she's absolutely right. They will love them.

 
I love this idea and secretly hope my kids will make one for me. Orrrr maybe even not so secretly. Maybe I'll set the supplies out on the kitchen table and lock myself in my bedroom while forcing them to make me one, rooster handles and all.
 
Happy weekend!
 
Pin It Now!

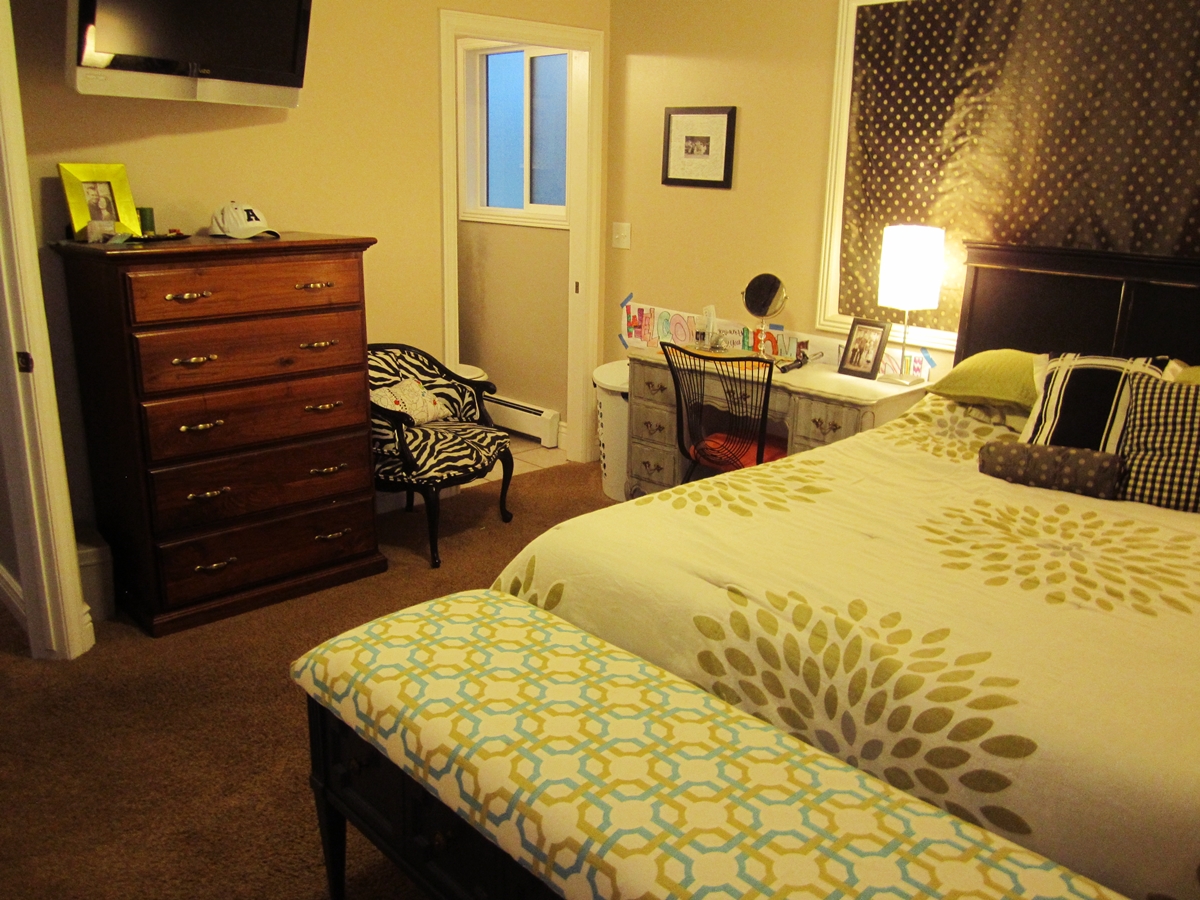
Master Bedroom Makeover: Wall Art

Master Bedroom Makeover
Day 8: Wall Art
** Note: This post is part of a 12-step series in my master bedroom makeover. Links to the other (previous) steps are listed at the end of this post.

Okay, so here's my thing about art. It's deeply personal, what speaks to each of us, don't you think? I'm a little hesitant to share these with you (which I find strange...of all the things to hesitate on! Art?!), because part of me is all, "Other people know so much about art, they'll probably roll their eyes at this," and another part of me is like, "I need some more time to develop my art collection!" and the last part of me is going, "The snack situation around here stinks. Really? Chocolate chips on solo? Scraping the bottom of the barrel..."

Regardless, here's our master bedroom wall art as it currently stands, though it will likely change tomorrow. I'm fickle like that:

 
Here's before: one lone, sorry photo smack-dab between the window and bathroom.


 I replaced that with a watercolor my 4-year-old did. She calls it "Sunset on a Waterfall," and you can laugh your faces off at me, but I couldn't love it more. Also, I wanted it to be part of the bedroom itself and thus hung it lower and off-center of the wall, closer to the window.

 
The far corner also has a small trio of frames, one of which is our temple marriage certificate. (I know, I know. Awwww....) We noticed it was looking kind of faded, so that came down and is filed away for when we purchase a more protective glass frame.

 
I hung up this new organically themed trio of frames. I bought two of the prints from 20x200 a while ago and luuuuurve them. The texture shown in the Nature books photo is unreal, and I love the story behind it. And, hello, a random gumball machine on the sidewalk outside a chain link fence? The possibilities of interpretation are endless.
 

There. Art I love. Go ahead and laugh, if you must. I'll be over there, drowning my shame in a glass of chocolate (chip'd) milk...

Tomorrow is Day 9: Lighting. I have a super pretty DIY chandelier tutorial for you, so excited to share!

Check out previous steps during the 12 Days of Master Bedroom Makeover:
Pin It Now!

Happy weekend.

Kitchen Floor Discovery #1: No thanks.


Kitchen Floor Discovery #2: Yes please!
 
 
Have a lovely weekend.
 
xox
Pin It Now!
Related Posts Plugin for WordPress, Blogger...
Pin It button on image hover