I can't be the only one with "stuff" sitting around in boxes in my house, waiting for the perfect project to come along, can I? I can? Dang. In any case, that's the zipper situation at this joint.
Vintage zipper world, meet modern display form. Bam.
Let's start at the beginning. Once upon a time, my mom "gifted" me a boxful of vintage zippers from my gramma's house. Below showcases, like, an eighth of those puppies.
I got tired of their sitting around. So I got my creative juices flowing (kickstarted by a handful of mike & ikes, if you must know) and started pulling out the ones I liked. Addie joined in on the fun (thinking she was hilarious in her baby sister's booster seat).
After editing the zippers, I found an order I liked. I had a vision in my head of a field of greenish-grey with a random bright poppy poking out its colorful head.
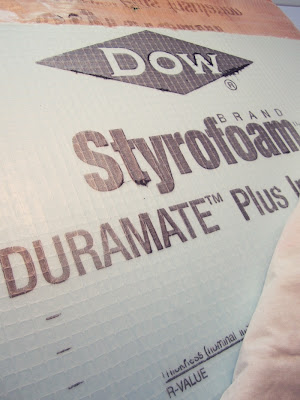
Using a piece of leftover foam board (you can find this at any hardware store, sold in 4' x 8' sheets, by the drywall or lumber, I think), I cut the piece to the size I wanted, which was about 2" shorter (on all sides) than my fabric that would eventually cover the foam board.
I didn't mark any lines or anything; simply used a metal right-angle ruler and followed it with a razor. My razor blade wasn't the sharpest, so the cut wasn't as clean as it could've been. I'd recommend using a brand-new razor blade for cutting foam board for any type of project.
I didn't worry that my cut wasn't perfect; it will be covered up.
I laid my fabric on top of the foam board (my fabric was lightweight, so I made sure it was on top of the blank side of the foam board), making sure the edges overhung enough on all sides. Then, I folded about half the fabric onto the other half and sprayed spray adhesive on the foam.
I carefully pulled the folded-up half of fabric back down over the spray-adhesed (yep) foam board. Working from the middle of the board to the edges, I carefully smoothed out the fabric until it was taut. Repeated for the other half of the board.
At this point, the fabric was "glued" down and was nice and smooth on the foam board, but the edges were floppy. After flipping the foam board over (fabric-covered side down), I sprayed adhesive along one side of the board and folded the fabric tightly around the edge. Kind of like wrapping a present...but not...but kind of.
I did the opposide edge next, so now there were two (opposite) edges glued down, two edges still free. Next up: corners. I knew the crispness (or lack thereof) of the corners would make or break this project. I pulled the fabric at an angle so the fabric came squarely around the edge and smoothed it down. (It stuck on some leftover adhesive from when I had sprayed the sides, but if it hadn't, I would've sprayed a teensy bit of adhesive on the foam here to hold it down.) This left triangle-shaped fabric folds on either side of the corner.
I sprayed a slight amount of adhesive to the top and glued it down. Didn't touch the bottom "triangle" part yet. Repeat for all four corners.
Once all corners were crisp and adhered, I then went back and finished up the last two unglued sides. Let the adhesive dry for a minute or two and double-checked all sides and corners for crispness. Then, fabric side up, I laid out my zippers.
Because I thought the vintage zippers would look interesting as a modern piece, I made sure there was plenty of white space. Minimalism. Simplicity.
Once I had them where and how I wanted them, I glued down all the ends first. (This kept them in place so I didn't mis-space them as I went.) I then went back and glued down each zipper (doing about 8" at a time so the glue wouldn't cool).
Viola. I love that unexpected pop of red.
Start to finish, it took me under an hour to do this project. So easy. And free! And, even if I didn't have zippers, I could see a similar project being successful with a number of different materials: buttons, bangle bracelets (how cool would the circle shapes be?)...a collection of anything, really.
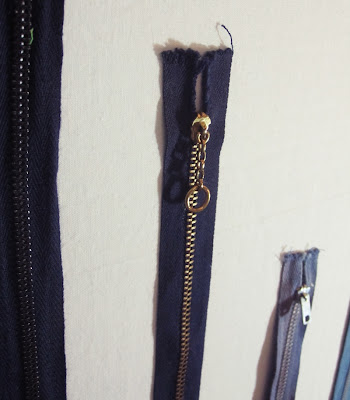
You guys, nothing beats vintage. Well, fine, SOME things beat vintage. But still...I love the details of older stuff, like this zipper pull:
The piece currently hangs at the bottom of our staircase (I used four 3M poster-hanging strips, one in each corner, to prevent the foam board from curling). The photo below looks a little odd, because it's an awkward space to photograph. But the real-life version makes me happy every time I see it.
And isn't that what it's all about? (Answer: Yes. Yes it is.)
{shared A Round Tuit, here, here, here, here, here, here, here, here, here, here, here, here, here, and here}
Pin It Now!


Hi Brittney, this is so fun. Kind of reminds of a bar code. It's great to use our stashes in new and creative ways. I'm visiting from Shabby Nest's linky party and I'm now following you through GFC. Hope you can stop by and visit sometime and follow back. Have a great weekend!
ReplyDeleteTuula :)
Bar code! That's exactly it, Tuula. Thanks for visiting!
Delete