
Guest Bedroom Makeover
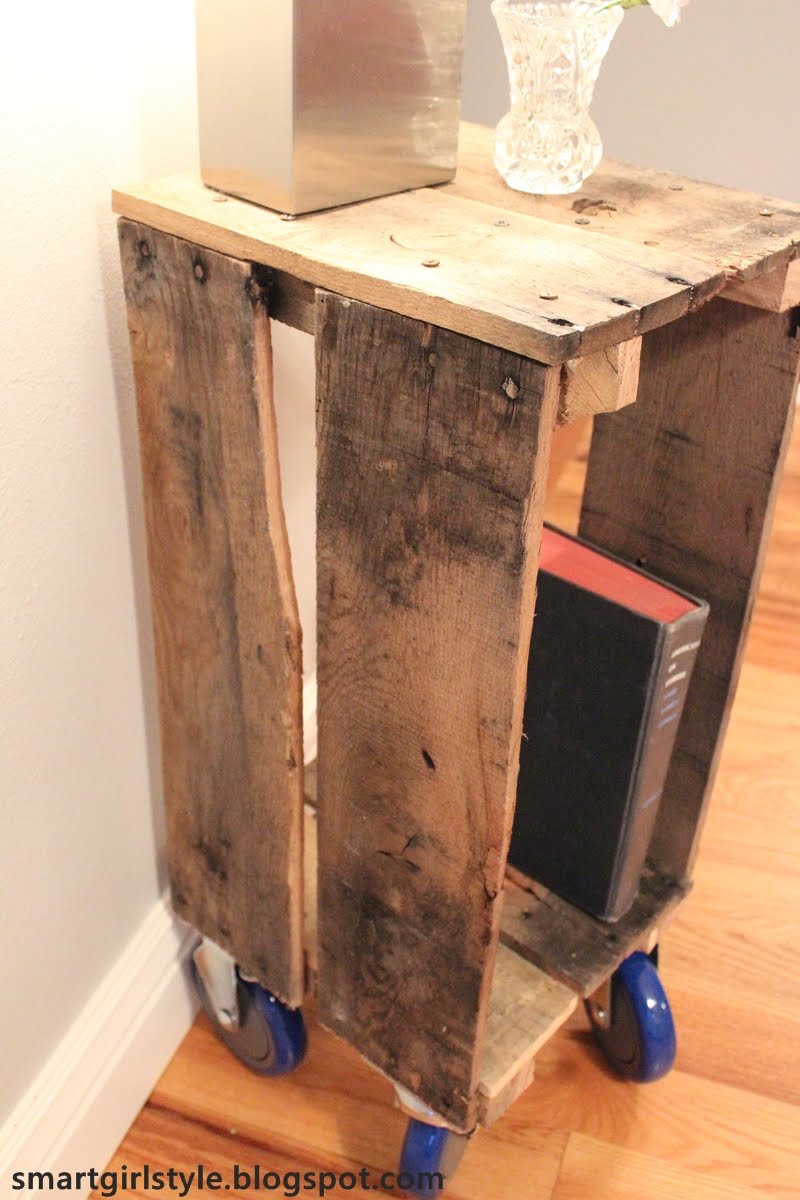
Day 7: Nightstands (or "How to Make a Rolling Pallet Board Side Table")
**Note: This is part of a 12-step bedroom makeover series. Find the previous steps at the bottom of this post.**
Due to space constraints in the bedroom, I decided to DIY a custom-sized nightstand.
Due to budget constraints, that nightstand is made out of pallet boards (read: free!).
Due to technical constraints, you won't hear me weeping over how much I love the result.
(I know. Thank you, technical constraints.)

[Due to the overload of photos, click through for the full tutorial. Sorry for the hassle.]
Let me preface this by saying: I did this project in a morning. It's super easy. I enjoy working with pallet boards because they're so inherently flawed that it eases my anxiety about doing things perfectly; in fact, most measurements I did on this were totally eyeballed. Don't be afraid of a crack there or a gap here in your completed side table. It enhances the charm.
Take a wooden pallet and saw the top & bottom end boards right next to the middle 2x4. Then cut the 2x4s to free the boards from the pallet.

Do the same thing on another set of boards, so you end up with two pieces that look like this:

Cut them in half (doesn't have to be exact) lengthwise:

You should now have four of these edged pieces, all approximately the same size. Set aside.
Take the board ends that you pulled off your pallet earlier (you should have four) and measure how deep you want your side table to be. Cut them all.

That's all the cutting/sawing. Hooray!

[Move your project indoors if you live in a subarctic region or Utah in January. Either/or. Temps were hovering around 0'F for me, so I packed the party to my basement here.]
Fix or reinforce edge pieces as needed. I added at least a screw to all of mine; some of them required glue AND screws.

Take two edges pieces and screw the side of one of the four cut boards onto the bottom 2x4s (see photo below). This board will become half of the surface of the bottom of your side table. I know it's kind of a nuisance, but always pre-drill when screwing into pallet wood; it tends to split easily if you don't.

Take another board piece and screw (and glue if you want; I did) it to the two top 2x4s. This board is now half of the top surface of your side table. (I chose my favorite two boards to be the top - I just love the knots!)

Repeat these steps for your other edges pieces. You should have two table halves now.
Take some of your "odds & ends" pieces and cut them in half lengthwise. (Or break them with your bare hands, if the wood is weathered enough and you're too lazy to go find a suitable cutting device.) (Guilty.) Screw these to the under side of the top and bottom boards on one of your table halves; these will serve as the connecting pieces. Make sure the screws you're using here aren't too long or they will poke through.

Screw the other half of the table onto the connecting boards you just attached. Because pallet board widths can vary, make sure you attach your two widest boards first (for me, this was the top). I was then able to leave an appropriate-sized space between the bottom boards so my table wouldn't be squeewonky.

That's right. Squeewonky.

(Remember that tip I gave you about choosing appropriately sized screws? That was experience talking.)

Final step: Attach your casters. I had these oversized blue guys on-hand. I only did two screws on each caster because mine were so heavy duty to begin with. DeLISHiously heavy duty.

And enjoy your new side table. I didn't even sand mine. Maybe I still will. But, let's be honest, I won't.

I love the raw texture and mismatched screws everywhere.

And also I love the ironic industrial-whimsy of those wheels.

Those wheels!

For me, the casters make the whole thing. They're completely unexpected and maybe awesome.
My pet. My precious. Into the guest bedroom you go. Until I come and steal you for myself.
Come back for Day 8: Reading Lamps. I've had a change of plans since I posted the original mood board, which at first made me sad but now makes me glad. Check it out; you might think it's rad.
(I know what you're thinking. Dr. Seuss has nothing on me. You couldn't be more right. Tonight. Drink Sprite.)
(Wow. "Publish" already.)
Check out the previous steps to this bedroom makeover:
Day 1: Inspiration Board
Day 2: Paint Walls
Day 3: Ikea Malm Dresser Makeover
Featured!

{shared 52 Mantels, A Glimpse Inside, A Jennuine Life, A Little Knick Knack, ADD Housewife, Beyond the Picket Fence, Chic on a Shoestring Budget, DIY by Design, Domestically Speaking, Easy Living Mom, Fireflies & Jellybeans, GingerSnap Crafts, House of Hepworths, Lil Luna, Miss Mustard Seed, My Girlish Whims, My Repurposed Life, My Romantic Home, Polka Dots on Parade, Shabby Creek Cottage, Simply Designing, Somewhat Simple, Sugar and Dots, The 36th Avenue, The Shabby Nest, Trendy Treehouse, What About}
Pin It Now!
"maybe awesome" -they're pretty cool! I love the bright blue!
ReplyDeleteMe tooooo! It's totally randomly unexpected, right? And you and I may be the only ones on the planet loving it, but at least we'll stand confidently on that side of the line. Because, hello, bright blue casters? Can't go wrong. :)
DeleteHow cool and so versatile! These could be used anywhere if you changed your mind and didn't want them in the bedroom one day! LOVE the wheels!
ReplyDeleteJenna @ rainonatinroof.com
I had that same thought, Jenna. I think they might actually end up in the living room one day. I just hate to have those glorious wheels "wasted" in the depths of the basement...
DeleteWe sell pallets and my husband gets quite creative with pallets as well. His latest creation is this http://www.tidbitsofexperience.com/creativity-used-to-make-a-new-look/ . He does all kinds of things with them.
ReplyDeleteI like your rolling cart idea as well. I may have to get him to make some of those too.
I checked out that desk, Crystal. Nice! So great to have a workspace customized just for you...and, hello, when it's out of pallets, that means it's free. Hooray for free.
DeleteVery clever and your night table looks beautiful too! I've got this linked to my DIY nightstands post as well today, nice job!
ReplyDelete... nnightstandsbedroom.blogspot.com
ReplyDeleteHaving a Unique Bedroom nightstand or bedside table is pretty important. I chose to have large nightstands, mostly because I took out our dresser, incorporated it into the closet, and they hold a lot of stuff.
ReplyDeleteRoom has turned into an expansion of our identity, intrigues and values. After entering, one would likely notice the absence of any music bunch, meagerly clad female model, or undoubtedly, any Additional resources decoration at all on our walls.On the opposite side of room lies my unwinding region, usually alluded to as a bed.
ReplyDelete
ReplyDeleteThanks for your informative writing. Get 30%-70%
Discount from FZillion.com on all brandedDuvet Covers.
USA Free shipping and free return. 75 days Return
Policy.
I also make nightstand in my bedroom just like this as it beautify the level of my room and I just love to have Miter saw. I am amazed by using this.
ReplyDeletetv sales black friday
ReplyDeletecyber monday deals on gtx 1070
"nikon" d3500 black friday
best buy black friday projector deals
4 piece stainless steel kitchen appliance package lowest black friday
tv sales black friday
acer predator x34.
hd projector black friday
black friday computer monitor deals 2020
asus rog swift pg279q manual
Great piece of content after reading all this I'm feeling so overwhleming that I've gain some sort of knowledge from this page. Keep up the good work!! Thank YOU!
ReplyDeleteBest iron rich foods