Guest Bedroom Makeover
Day 9: Stuff on the Walls
**Note: This is part of a 12-step bedroom makeover series. Find the previous steps at the bottom of this post.**
Hey! Let's get something on those guest bedroom walls, shall we? Remember the rope-hung mirror on the inspiration board? Well, I was considering all sorts of ways to make that happen but was dragging my feet because they all seemed too hard.
(Please tell me sometimes you don't do stuff, too, because it seems too hard? Pretty please?)
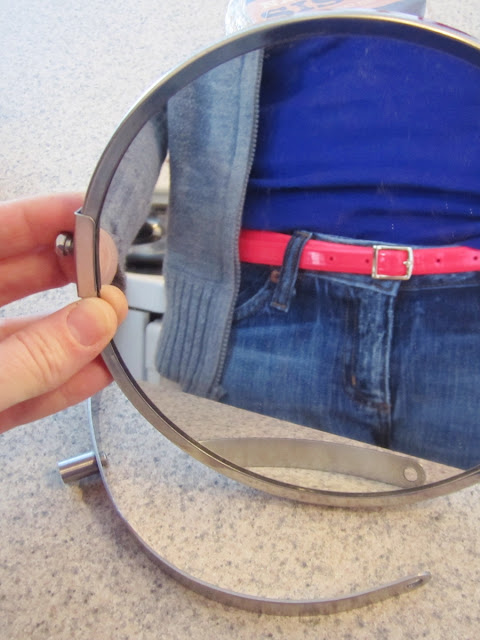
Regardless of my impressive level of laziness, in doing some major reorganization and deep cleaning to make this much-needed guest bedroom makeover happen, I stumbled across this Ikea mirror I had purchased years ago but never used.
I then stumbled myself to Hobby Lobby and purchased some sisal rope.
I began by donning my most neon belt. (Just kidding. I had already donned that. But its neon-inity rockets me into the superpowers realm, I think.
(A realm in which sleep is unnecessary and women are encouraged to flock to peanut m&ms like salmon to the River Capistrami.)
(I have no idea what/where Capistrami is, or even if that's how it's spelled. I would guess Italy?)
(What kind of ridonculous tangent is this? C'mon. Back to bidness.)
(A realm in which sleep is unnecessary and women are encouraged to flock to peanut m&ms like salmon to the River Capistrami.)
(I have no idea what/where Capistrami is, or even if that's how it's spelled. I would guess Italy?)
(What kind of ridonculous tangent is this? C'mon. Back to bidness.)
I began, for real this time, by unscrewing the swivel attachment from the sides.
I ended up with a free-floating mirror with two side attachment screws, which was perfect.
Except the screws were too short to tie rope to. So I rummaged through our "leftover screws" jar and found a replacement. Two of 'em. The thread variance didn't matter.
Tied a single knot around the screw as tightly as possible. Repeat on other side.
To secure the knot, I hot-glued some key spots and also, subtly, the rope-end so it wouldn't unravel.
I like how it's looking hanging from my hand in the kitchen. That's a good sign, I guess.
Maybe I'll like it even more if I actually clean the thing? Hmmm. A clean, non-toothpaste-splattered mirror. An interesting concept I'd like to ponder for a while.
Come back for Day 10: Bedding. You're going to love this one. Maybe. And if you don't, at least you'll have time between now and then to bake yourself some muffins that for SURE you'll love. So. Win-win scenarios, that's what I'm all about.
Check out the previous steps to this bedroom makeover:
Day 1: Inspiration Board
Day 2: Paint Walls
Day 3: Ikea Malm Dresser Makeover
Day 7: Nightstands
Day 8: Reading Lamps
Pin It Now!


Great look...even if it is smudged! I came by from Shabby Nest and I'm loving your blog ;)
ReplyDeleteThanks, Sherry. Can you please come over and compliment all my smudged mirrors? Pretty please? :)
DeleteI love that you're loving my blog. Seriously.
Oh that's cute! Thanks for sharing. Love your blog!
ReplyDeleteLiz
http://liz-makes.blogspot.com/
I'm happy to share, Liz. Glad you like it here!
Delete