Showing posts with label garden. Show all posts

Strawberry Girl Strikes Again

You guys, if you're looking into growing your own vegetables, a box garden is TOTALLY the way to go. I can't tell you enough how awesome it is...once you get past the hard part of building and filling the boxes with great soil. We absolutely love ours, and the crazy part is, it's wildly successful even though we're amateur green thumbs. Love a good success story!
 
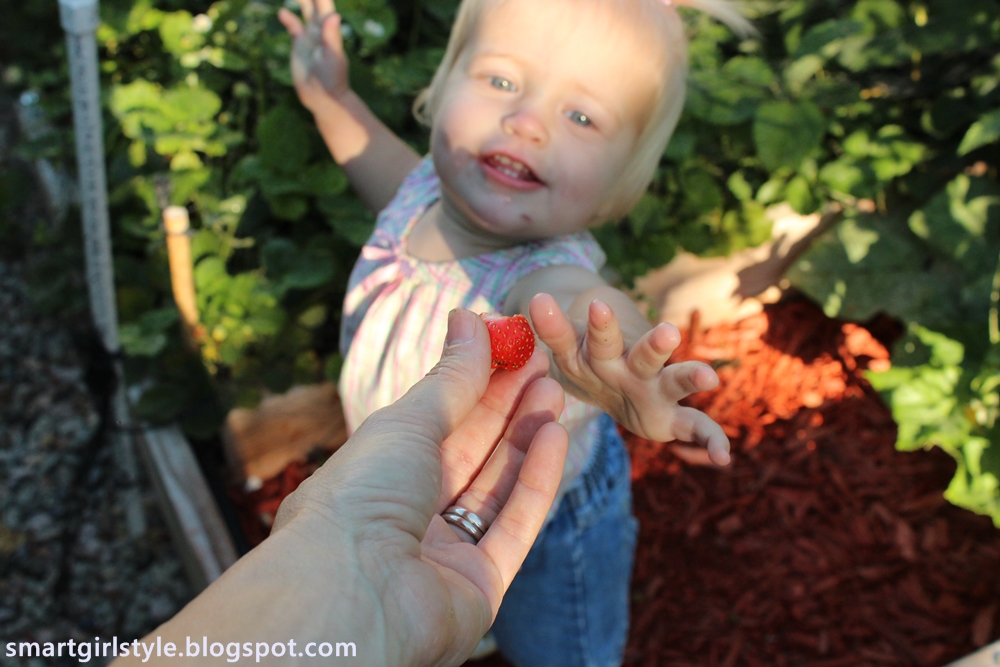
Know who else loves gardening (read: strawberry) success? This little innocent. And by "innocent" I mean "strawberry klepto."
 
 
She always sneaks into the garden to check out the strawberry patch. Green, pink, or red, she doesn't care what color they are - she'll pick them and eat them, stems and all.
 
 
A rare fistful that actually has reddish color.
 
 
She's a girl of few real words, but this facial expression translates into: "I suppose I'll wait semi-patiently while you pick me some. But make it fast. And make them numerous."
 
 
"Yessssss! Gimme."
 
 
"Another one?! I'm the luckiest girl in the world! And you're the best mom! And super pretty and not stinky at all, even though you haven't showered yet and it's mid-morning!"
 
 
Quick-as-a-cat reflexes, from my hand to her mouth. 1 strawberry = 1 mouthful.
 
 
She'll eat these things until she's sick, but I'll admit, I have a hard time ignoring this level of joy.
 
 
Have a very happy weekend, friends. Thanks for stopping by.
Pin It Now!

Backyard Shed: In the Works

We've been working really hard on building a shed in our backyard this summer. It's a small little thing, not even 80 square feet, but you wouldn't know that by how long it's taking us to build.
 
And if you don't know how that is, I guess I'm jealous of you and your building efficiency. We're amateur builders, following guidance given by shed-building library books, what can I say.
(Mmmmmm. Libraries. Little bits of heaven on earth, second only to old-fashioned brick and mortar book stores.)
(Remember those?)
 
Our backyard is fairly small, so we had to build the shed in the corner. It was too close to the property line to lay a foundation, so we used cement piers instead. (Apparently, this makes the structure "temporary" for all legal intents and purposes.)


Also, last summer we had our sprinkler system put in. The layout of that system, coupled with our absolute non-desire to move pipe at this point, meant creating a custom (translation: oddly shaped) shed shape.


More after the break.
Pin It Now!

Box Vegetable Garden: June Update

I promised in this post on starting our box garden that I'd update you all about what we're learning as rookie box gardeners. I'm happy to report that: so far, so good. And we're learning stuff, which is never a bad thing.
 
View of the garden from the play area of our backyard:
 

Our vision was for morning glories to quickly climb the trellis along the edge of the lawn (front in the photo above), creating a sort of living, flowery wall. While the morning glories are, indeed, beginning to climb (and bloom, even), it's not nearly fast enough for our liking. The trellis is still pretty bare. Maybe next year we'll try clematis or something similar. Fast-growing, sun-loving, and flowering - those are the main criteria.

 
We've been seriously enjoying the bounty of this vegetable garden already. Fresh strawberries for breakfast,
 

lettuce and spinach all day every day, 


and peas for anytime snacking. Bliss delish.

 
Can I just say how much I love having a garden with kids? They get so excited to eat the stuff, it's awesome and rewarding and all that.
 
 
We learned that our variety of spinach (correnta, I think) tastes delicious but is super prone to mildew, so we'll probably go with something different next year. Radishes (not shown in these photos because they've come and gone) can actually be harvested not that long after planting (we waited a bit too long and had radishes that were shaped more like carrots; still tasty). And I've seen magpies perched on our homemade PVC-and-bird-netting strawberry cover, unsuccessfully trying to get to the red deliciousnesses. Success in the preliminary berry protection department!  

 
We think we planted waaaay too many potatoes, and they've grown far taller than we ever anticipated. We're a bit concerned they might squeeze out the pole beans (trying to grow up the trellis along the left-hand side in the photo above), and they're definitely blocking sunlight from the cilantro. We've tried to rein them in with nylon rope, but they're pretty wild. Not sure what we'll change for next year to make the crazy potato situation more manageable.
 
 
Also, as far as the box garden structure itself is concerned: we couldn't be happier with this setup. I think we've pulled three random weeds out of the garden this year. (That's my kind of weeding!) The produce is easily accessible for harvesting, and the formal structure of the box garden itself makes it super easy for us to modify things as needed (for example, tying back the potato leaves, adjusting the watering, etc.).
 
 
Plus, I just think box gardens look so organized and awesome. Oh, wait. That's because they are.

 
Next up: Building a backyard shed. And then a treehouse. And after that... the list goes on.
Life is so great!
Pin It Now!

Box Vegetable Garden: The Early Stages

Part of my recent absence from blog-ville has been due to our intensified gardening efforts. Paul and I built boxes for raised gardens last fall. And now we're putting things together for this growing season.
 
We're new at this. Box gardening, I mean. But we're researching a ton and approaching things carefully and intentionally. I'll tell you what we've done so far and keep you up-to-date on our process (including fails and successes) if you're interested in doing something similar.

 
FYI: We are in LOVE with this gardening method. It's so awesome and crisp and awesome and organized and did I say awesome.
 
 
So. Here's the north side of our house, where our box garden layout resides. Last fall, we built our two garden boxes to be 5' x 18' each. When we redid our sprinkler system last fall, we had the guys install a drip line for the garden.
 
After reading this fantastic square foot gardening book (All New Square Foot Gardening), we realized our boxes were too big, because we wouldn't be able to easily access stuff growing in the middle. So my husband had the genius idea of separating out partial "walkways" in the boxes.
 
 
What we now have in each original box are three square(ish) growing boxes (the big sections you see above), two 1'x2' boxes (the small parts on the left side of each), and two 4'x2' walkways (next to the small parts). Each box is 10" high, I think. Or maybe 12". We weather-proofed the outer wood last fall with something like this but were too impatient to waterproof the walkway edge boards, so I guess time will tell if that's a regrettable move.

We then added the soil, a combination of 1/3 vermiculite, 1/3 peat moss, and 1/3 compost varieties. No pics of the process, sorry, but it's not hard to figure out. Just dumped equal amounts onto a big old tarp, shook it up P.E.-parachute-style, and dumped it into the boxes. For the record, my husband is Rake-Man Extraordinaire. 11 years married, and I had no idea he possessed this super power.

Next step: trellises.
 
 
Using 1/2" electrical conduit, we constructed trellis frames for the north sides of both boxes. They are removable but secured into the ground by rebar. We bought nylon trellis netting at the hardware store (also available at garden centers) and tied it securely to the conduit frames. These will be for our climbing plants (e.g., peas, beans, tomatoes, etc.).
 
Paul built two 8'x8" boxes (long and skinny) for climbing flowers to create a "wall" between the yard and the garden. We added a trellis for these as well.
 
 
And what backyard is complete without a big blue ball by the fence?
 
We also put an archway, inherited from Paul's parents, in the corner so that the garden's entrance/exit would be intuitive and, hopefully, beautiful (once we get our climbers growing). Here's what it looks like from the backyard:
 
 
Pea gravel all around the boxes has been awesome, so you don't get muddy and can easily maneuver a wheelbarrow around all sides.
 
 
Planting is continuing to be a whole-family affair, which is fun.  The kids have all been super helpful, in their own way...
 
...from 8-year-old Carson,
 
 
...to 7-year-old Layla,
 
 
...to 4-year-old Addie (her swinging IS helpful, actually),

...to 1-year-old Violet, the cutest supervisor of all time. Those big baby blues don't miss a beat.
 
 
We planted some bare root strawberries (four per square foot) and constructed a simple yet *hopefully* effective bird keepaway cage out of PVC pipe and plastic bird netting for this section. It's removable (just lift up the cage) and secured into the ground with rebar.
 
 
We planted half Hecker and half All-Star varieties, I believe.
 
 
Grow, you bundles of potential deliciousness. GROW.
 
 
A large section is devoted to onions (16 per square foot). We grew some from seeds but then realized it's way faster and easier to get onion starts at the local garden store. So we supplemented with a million of those babies.
 
 
I'll say here that we marked out each square foot with nylon string, triple-strung for each line and tied onto metal 1/2" brackets screwed onto the box garden walls. This may seem like an unnecessary step, but it's been great for us - makes planning and planting (and, we anticipate, harvesting) so much easier. Plus, don't you think it just looks cool?
 
Red candy onions. Never tried 'em, but...c'mon. CANDY onions? I'm in.
 
 
So far, we've only been able to plant our strawberries, peas, cabbage & leafy greens, and onions outside. The rest of the stuff is in the greenhouse, patiently awaiting mother nature to officially go on spring break.
 
 
There you have it. Box gardening at the Smarts' house. Next up for the backyard: building a shed and a clubhouse for the kids. This should be interesting...
 
Featured!
A Jennuine Life Thrifty to Nifty Thursdays Feature
 
Pin It Now!
Related Posts Plugin for WordPress, Blogger...
Pin It button on image hover