Showing posts with label free. Show all posts

When one thing leads to another...

So there I was, minding my own business and munching on a handful of cookies [Editor's Note: the munching part may or may not be true, I can't remember exactly. But if history is any indication, then, yes, I was munching on cookies. And prolly some fisfuls of granola, too.], when my son poked his head down the stairs. "Mom, have you seen 'Return of the King'? I can't find it anywhere."
 
It was supposedly somewhere in the living room bookshelves, separated from its other JRR Tolkein counterparts because of different-colored spines. After hunting around a few shelves, I began to realize how ridiculous it was that I had "organized" many of our family's books in such a way (by color) that my children couldn't even access the ones they wanted. How can I raise my little army of readers if our books aren't intuitively organized?
 
(Coincidentally, this talented lady felt the same way as me. Gold star for us all, for coming to the same conclusions.)
 
Here's how my living room bookshelves looked previously. So heavy:
 
 
Notice how there are no bright colors? And way too many non-book objects?
 
 
So. I spent a pleasant afternoon a while back reorganizing our bookshelves by (most importantly) book type/topic, such as informative, religious, classic literature, entertainment/light reads, and non-fiction...and after dividing them all up, I put sections back onto the shelves by size and color. Except for the enormous vintage World Encyclopedia set (5th row down on each bookshelf), because you just can't do much with those stylistically except for hide them. And that was no option.
 
 
 I unearthed some books that had been vanquished to the depths of the basement because their spines were too colorful for the previous bookshelf arrangements. I tried to keep the "horizon" of books (the height-line) fairly even across each shelf, sometimes using non-book objects to make this happen. I incorporated fewer trinkets because I wanted it to be, first and foremost, a functional bookshelf and, secondarily, decorative. And I kept book sets (e.g., Lord of the Rings) together.

 
Although there are more books now, I love the change because the shelves actually seem lighter and the living room less stuffy overall. And, after all, who wants to munch handfuls of cookies in a stuffy living room? Not me. I mean, sure, I'd do it. But I wouldn't be happy about it.
 
Fast-forward about a day later, when I realized the newly colorfied shelves needed more colorful surroundings. This realization coincided with a(nother) Banana Incident by my 10-month-old. Translation: My adorbs baby secretly hucks bits of banana off of her high chair tray onto the floor for me to unwittingly mash into the rug with my bare feet an hour or two later. An experience which, btw, is every bit as awesome as it sounds.
 
Anyway, I realized that, although we love the rug under our dining room table, it wasn't going to last a year at this rate. Plus, it's big...bigger than the one in the living room...and more, colorful, too. Hmmmm....
 
Living room rug before:
 

So. I moved the old dining room rug into the living room (after some major baby food cleanupage) and moved the old living room rug into Violet's nursery.
 
 
Eventually, I'd like to swap out the current living room curtains for a lighter, small-print geometric and either replace the living room loveseat with two chairs (ideally) or simply sew a slipcover for the loveseat itself. The ultimate decision will depend on what I can find first - slipcover fabric or two compatible chairs. You never know.
 
 
 Anyway. One of my favorite things to do is rearrange what I've already got, because I can do it in a short amount of time, and it costs nothing for a completely fresh new look and feel.
 
What do you think...noticeable difference or no?
 
 
 By the by...since you're here and all, may I please pick your brains? Do you have any good ideas for decorating an unused fireplace? I've tried a few different things and haven't been thrilled with any of them. Okay. That's all.

Featured!
A Jennuine Life Thrifty to Nifty Thursdays Feature

{shared: A Glimpse Inside, A Jennuine Life, A Little Knick KnackBeyond the Picket Fence, Chic on a Shoestring Budget, DIY Showoff, Finding Fabulous, Fingerprints on the Fridge, Fireflies & Jellybeans, GingerSnap Crafts, House of Hepworths, I Heart Naptime, My Romantic Home, Or So She Says, Somewhat SimpleThe 36th Avenue, The Shabby Creek Cottage, The Shabby Nest, What-About}
Pin It Now!

The Best Materials for Decorating on a Tight Budget

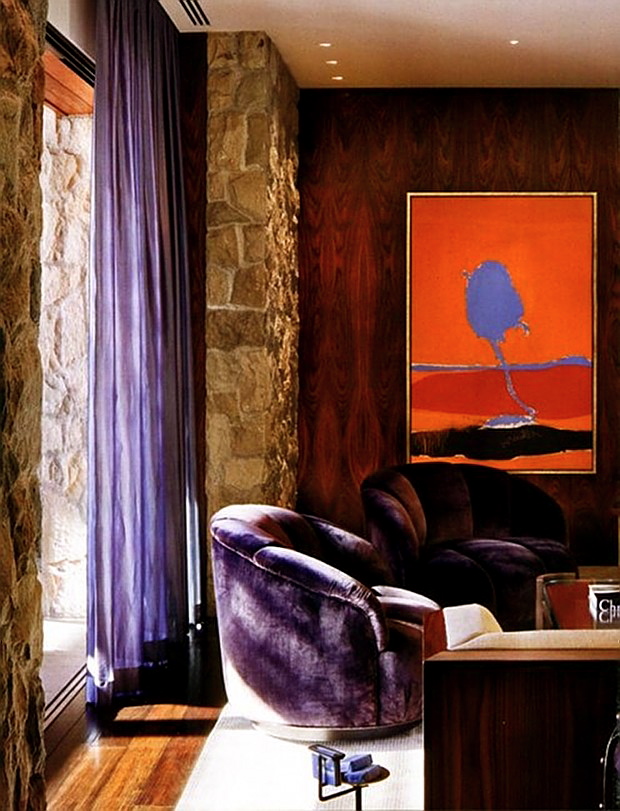
Have I told you all that we're trying to save up to take our kidlets to Hawaii this year? Well, we are. That's part of the reason I'm so budget-focused right now. Of course, I still have expensive dreams...

(Like Jennifer Aniston's luxe purple velvet chairs here, for example. If you had a cool $42 mil lying around a coupla years ago when her house was for sale, she probably would've thrown the chairs in for free.)
 
source
...but, for now, our family's financial priorities lie elsewhere. (ahem)
 
So, in the spirit of budgeting and decorating my home, the first thing I do is shop my house. What do I already have? Could it be repurposed? If so, awesome. However, there are times when the interior decorator in me needs something else to add a little home decorating boost but can't quite afford to make my whole dreams come true. ($42 million, anyone?)

Therefore, I present to you, my lovely readers, my top list of budget-friendly (translation: free, or pretty close to it) decorating resources. They're not for every project, to be sure, but they'll do in a pinch for a quick pick-me-up.


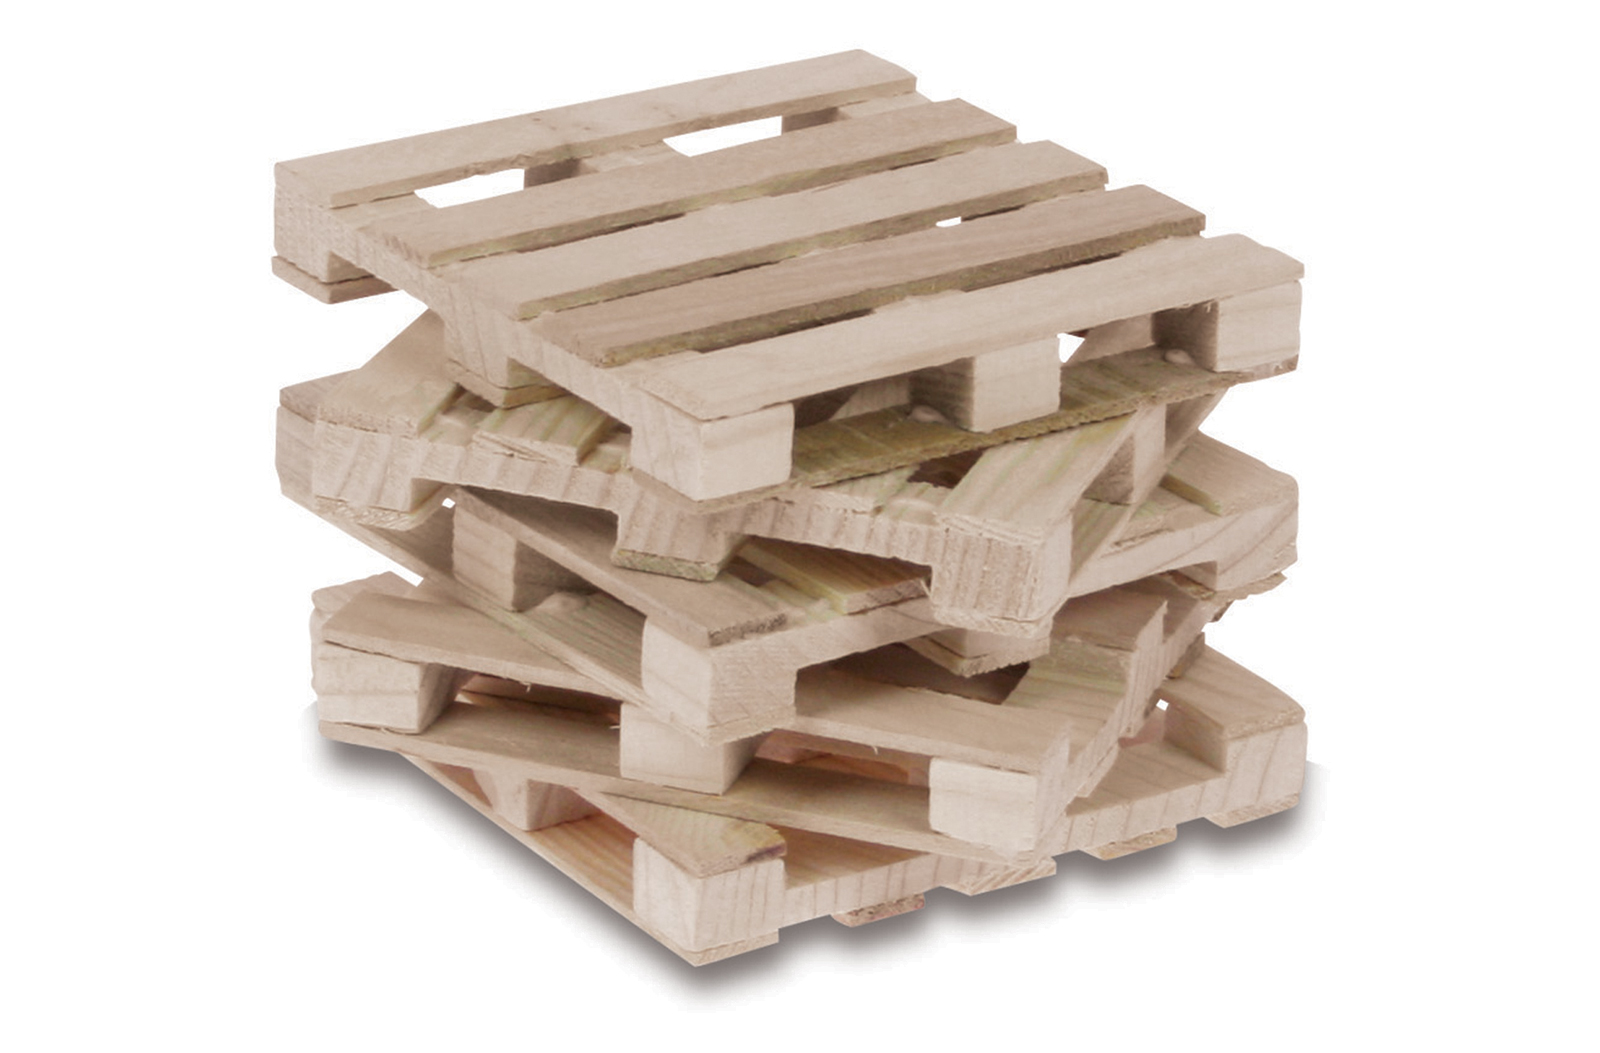
Pallet boards.
source
You knew I'd go here first, didn't you? Wood pallets are all the rage lately, and I've used them for several projects myself (like here and here). I've had the most success with finding quality pallets at my local Sears store. Just be sure to ask before taking, and be selective in choosing "safe" pallets to work with (what were they used for? were they chemically treated? are they moldy?). Also, keep those Tetanus boosters up-to-date!


Paint chips.

source
 

I've totally taken advantage of this free decorating resource for paint chip projects. I just love that you can choose any color(s) you want and then create artwork or functional pieces with paint chips for next to nothing. Just as a courtesy, though...make sure that you don't abuse the priviledge. Purchase some paint on occasion, too. :)


Sheets.

source
I've said it before, and I'll say it again: repurposing stuff (especially fabric) is a great use of resources. Using flat sheets as a fabric source, whether for curtains, bedding, or even artwork, is a great way to save money. Shop your own linen closet or get them inexpensively at supercenters. I think I'd bypass the thrift store on this one, though.


Mason jars.
source
These glass jars are sturdy and available in a variety of sizes and tints (or you could tint or paint your own), which make mason jars a prime candidate for a variety of home decor projects - lighting fixtures, planters, vases, random decorative accessories, you name it. Admit it...you've got some of these lying around with the well-intentioned plan that someday you're going to learn how to can, don't you? No? Just me? Oh...okay. Regardless, put them to good decorating use.


Cotton drop cloths.


source

Think beyond interior painting and how to paint a room when you look at drop cloths. These aren't free, but for a lot of yardage of heavy-duty cotton, they are a great budget option when sewing slipcovers, drapes, or anything, really, that could use a durable neutral fabric. You can purchase these at any hardware store starting at just $10. I just finished sewing a chair slipcover (my first one) using a 4'x15' drop cloth from Home Depot, and I'm pretty pleased with it (and the $12 price tag!).


Spray paint.

source

Also, I know that spray paint technically isn't "free," but I couldn't create a home decorating budget resources list and leave it out. Because for what you can do with a can of this stuff, it's such a great budget-friendly option. (Or, if you're a spray painting junkie like myself, you probably already have a bunch of cans sitting around waiting to be used up.) Transform furniture, frames, lighting, or random objects with some spray paint, and it'll freshen up an entire space. As I'm sure you already know.


 Am I forgetting anything obvious?

xox

Featured!

{shared: A Little Knick Knack, A Vision to RememberChic on a Shoestring Budget, Fingerprints on the Fridge, Finding Fabulous, Fireflies & Jellybeans, My Romantic Home, The Shabby Nest, What-About}

Pin It Now!

How to Combat the "Gimmes"

On occasion (okay, fine, FREQUENTLY) I get a huge case of the "gimmes" in which I want stuff that's newer, better, brighter, more different than what I've got already.
 
(Frankly, this can be a very expensive medical condition. Especially when I've got a healthy "gimme" list going on for nearly every room in my house...) 
 
What I'm about to reveal to you is an embarrassingly honest display of what I do to combat this malady. It's a pretty fail-proof prescription, really. And it brings me satisfaction and contentment.
 
Ready? Here goes:
 
I clean.
 

For many of you, this is a no-brainer. Of course cleaning is good! you're thinking to your scrubbed little selves. Not for me, though. I'd rather be knee-deep in a paint project than anywhere near a squeegee (sp?) or vacuum.


Many of you probably enjoy cleaning and find it therapeutic. I can understand this odd sense of attack-scrub mode about 4% of the time, although 90% of my time is spent trying to avoid the activity. (And the other 6% just wants to eat cookies in peace.)


What a thorough cleaning and pick-up session does, though, is make me realize I don't have to buy "stuff" to make things presentable, even pretty, around here.


Sure, I'd love to paint walls and frame out the bathroom mirror and replace shower curtains and vanity hardware. And I'll get to those things eventually, but for today, I need to take care of what I've got in the first place!


Plus, to be honest, it takes so much time to do a house-wide cleaning job, that I have no minutes to spare at the end of the day for shopping. :) Win-win.

 
Do any of you like cleaning? What's your most rewarding household chore? (Me: Doing dishes.) What's your worst chore? (Me: Dusting. Ugh.)
 
Or do you have your own method to combat the gimmes? I'd love to hear it. Because, in case you couldn't tell, having to clean is really something I could live without...
Pin It Now!

Master Bedroom Makeover: Furniture Arrangement

Master Bedroom Makeover
Day 5: Arrange Furniture to Maximize Space & Light
** Note: This post is part of a 12-step series in my master bedroom makeover. Links to the other (previous) steps are listed at the end of this post.

Throughout junior high and high school, I rearranged my bedroom at least every other month. Maybe more. I was addicted! Something about making a space feel fresh and new and interesting without spending anything or, really, changing anything but the layout... thrilling, I tell you.

(This coming from the girl who, at this time of my life, also got thrilled with eating Costco's apple crunch muffins on occasion, so...do with that information what you will.)

Here's the master bedroom arrangement previously:


The windows are strange in this room; they're centered on the walls, but the bed itself couldn't be centered beneath either one because the door to the room is at an angle, and the swinging door would hit the bed (not to mention, you wouldn't be able to walk around it).


I felt like the headboard covering up the bottom portion of the largest window was a huge waste of natural light. Plus, the beautiful walnut dresser (handmade by my father-in-law for our wedding) stuck out further than the door frame, so that was always a little awkward.

Also, notice the walkway into the bathroom? Yeah. It's like a foot wide. Lame.


So. When I redid the headboard, I lowered it a few inches so it would fit just under the other window. This maximizes light in the room, and I love it.


We first faced the dresser toward the bed, but my husband had the idea to change the way the drawers face so that whenever one of us (he) has to get up earlier than the other (me), it would be less disturbing to the person still in bed (me). So we changed it up, and I don't hate it. He's a sweetheart.


 The padded bench moved from the end of our bed to be a new window seat, slash, reading nook, slash putting-shoes-on bench, slash, one kid's haven for Saturday morning cartoon viewing. Perfect.


Can I say how much I love having a "sitting" nook? So so much. Our room is really quite small, and I didn't think it was possible, to be honest. Hooray!


The vanity fits much better here, although we now need some sort of lighting so I can actually see what I'm doing in makeup application.


I don't know that it translates yet, with things not "staged" or whatever (remember, we're just on Day 5 of a 12-day process!), but I just feel like things flow much better now, despite the trickiness of the room's architecture. I'm sure every room has trickiness to some degree, but this room seems to bring more than the average bear.

Which, if anyone knows how that little saying got started, please enlighten us all.

Tomorrow is Day 6: Window Coverings! Starting to make a big impact...

Check out previous steps during the 12 Days of Master Bedroom Makeover:
Pin It Now!

Master Bedroom Makeover: Floor (or How To Clean A Flat Weave Rug)

Master Bedroom Makeover
Day 3: Floor (a.k.a. Chevron Rug)
 
** Note: This post is part of a 12-step series in my master bedroom makeover. Links to the other (previous) steps are listed at the end of this post. 
 
So. We've got our inspiration board and have painted our walls. Today, we're going to tackle flooring...before we deal with furniture. See, isn't that so insightful of me? And plan-aheadish? I'm not normally so in tune to effort-saving chronology. Hooray for getting old & lazy.
 
You may or may not recall this post about how I painted a chevron rug long ago. Well, it hung out in our basement for a while, but then I had to use it outside (too long a story to tell you) (you're welcome), and it got, in a word, nasty.

Shockingly, I never got around to cleaning it. (Enter: eerily foreshadowish organ music.) Until today. Because I need a neutral yet patterned rug for my master bedroom, and this one will do just fine...if I can get it clean.

 
Some serious black marks on the fibers. To get rid of them, I pulled out my go-to cleaner for ev.ery.thing: OxiClean. If you guys have never used this product, you're missing out on the whitest whites and stainless...uh...est stuff around. This is miracle-in-a-carton, I'm telling you.

 
I cleared the tub free of debris ("debris" actually sounds suspiciously like "barBIE," an apt coincidence in our house of 3 little girls)...

 
...and filled it about half full with warm/hot water and a heaping scoop of OxiClean. After stirring it around enough so the OxiClean dissolved, I put the rug in there, swirled IT around to make sure all parts were wet and mostly underwater, and let it soak for a few hours. (You don't want OxiClean to dry or crystallize on your stuff, so about every hour or so I went back in to stir the rug a bit.)

 
Holy hannah, that water got nasty. Ugh.
 
The rug is fairly large, but because it's a flat weave, I was able to throw it into my washing machine solo and wash it up/rinse it out. If I couldn't do this, I would've probably taken it outside to hose down.
 
About 30 minutes and more than a few washer thump-thumps later, the rug was done. Not wanting to strain my aging dryer (and because I didn't know how the latex paint would take a high-heat drying session), I hung it over the railing to air-dry.
 
 
Turned out good as new. (I heart you, OxiClean!)
 
Here it is in the master bedroom. I may or may not change it around over the next few days. As you know, I have to sit with things in a space for a while to see if they really work or not.
 
 
Tomorrow is Day 4: Headboard. 

Check out previous steps during the 12 Days of Master Bedroom Makeover:
Pin It Now!

How to Wrap a Box (without making it look like you wrapped a box)

My husband was out of town last week. I found myself staying up way too late every night, clinging to the warm glow of HGTV eminating from our tv. I may or may not have downed an entire sack of dried bananas one night (helloooo, 240% of my daily saturated fat).
 
But one productive thing I did do was add a little color to my entry table, via a wrapping paper-covered old cell phone box. And while a tutorial on such things is probably a bit overkill, I have nothing to say 'cept: look at my dried banana consumption. Overkill is how I roll.
 
Here's how I did it:

Step 1: Get box. The color is so bright, it would show through just a single sheet of wrapping paper. So I wrapped the lid with a plain sheet of white paper first.
 
 
Step 2: Using some kind of spray adhesive (LOVE this stuff)...

 
...lightly spray the middle of the paper. Set box lid on this area and smooth it out. Then lightly spray the first long side (clear to the edge of the paper). Don't overdo the spray adhesive; that stuff is powerful, and this is just paper. A little spritz will do just fine.

 
Step 3: Fold the first long edge up, and smooth it out. Repeat on opposide long edge.

 
Step 4: You really want both layers of paper to be smooth and taut, so make sure everything is smooth before you move on. Then cut slits for the excess paper foldover.


Step 5: I didn't want the box to look like someone came and dropped off a present on my entry table (although, don't get me wrong, I loooove presents dropped off anywhere), so I opted to keep edges streamlined and cut every bit of excess paper off. This includes the four squares at the corners. 

 
Step 6: Spray adhesive onto the last two sides (the short edges), and repeat steps 2-4. Your base layer of white paper should be done, and your box should look smooth.
 
Step 7: Choose your wrapping (or scrapbook...or any other kind of) paper for the outer layer. This time, use the spray adhesive to do the top (or bottom, in the photo below) and all four sides at the same time. Fold each edge up, smooth it with your fingers, and then crease each corner to make a kind of triangle at each corner.

 
Step 8: Carefully and as closely to the box as possible (I even turned my scissors so the blade of the bottom scissor-part was directly next to the box corner), cut each corner exactly on the four corner folds.

 
Step 9: Fold over all the edges, smooth them down. (You could cover the whole thing with ModPodge here, but I didn't. I had dried bananas to eat, people.) You're done! Unless you wanted to move onto step 10...

 
...Step 10: Use Sharpies and a ruler to draw stripes onto a piece of white cardstock (Sharpie Art! yesss.), then wrap aNOTHer box in that cardstock following this tutorial. Just because stripes are an awesome graphic.


 Welp, there you go. Cheapest project ever. I like how the wrapping paper print ties in with the botanicals, and the b&w stripes tie in with the lines of, well, everything.

{shared here and here}

Ack! Blogger just ate some links where I shared this...please let me know if I'm missing your URL, and I'll add it ASAP. So sorry!
Pin It Now!
Related Posts Plugin for WordPress, Blogger...
Pin It button on image hover